具備適應性鑑別器擴增的資料效率 GAN
作者: András Béres
建立日期 2021/10/28
上次修改日期 2025/01/23
說明: 使用 Caltech Birds 資料集,從有限的資料中生成影像。

簡介
GAN
生成對抗網路 (GAN) 是一類流行的生成式深度學習模型,常被用於影像生成。它們由一對相互對抗的神經網路組成,稱為鑑別器和生成器。鑑別器的任務是區分真實影像和生成的(偽造的)影像,而生成器網路則試圖透過生成越來越逼真的影像來欺騙鑑別器。然而,如果生成器太容易或太難以欺騙,它可能無法為生成器提供有用的學習訊號,因此訓練 GAN 通常被認為是一項困難的任務。
GAN 的資料擴增
資料擴增是深度學習中一種流行的技術,它是隨機將語義保留轉換應用於輸入資料,以生成多個逼真版本,從而有效地增加可用訓練資料量的過程。最簡單的例子是左右翻轉影像,這在保留其內容的同時生成第二個獨特的訓練樣本。資料擴增通常用於監督式學習中,以防止過度擬合並增強泛化能力。
StyleGAN2-ADA 的作者表明,鑑別器過度擬合可能是 GAN 中的一個問題,尤其是在只有少量訓練資料可用的情況下。他們提出了適應性鑑別器擴增來緩解這個問題。
然而,將資料擴增應用於 GAN 並非易事。由於生成器是使用鑑別器的梯度來更新的,如果生成的影像被擴增,則擴增管線必須是可微分的,並且還必須與 GPU 相容,以提高計算效率。幸運的是,Keras 影像擴增層 滿足了這兩個要求,因此非常適合此任務。
可逆資料擴增
在生成模型中使用資料擴增時,一個可能的困難是 「洩漏擴增」(第 2.2 節) 的問題,也就是當模型生成已經擴增的影像時。這表示它無法將擴增與底層資料分佈分開,這可能是由於使用了不可逆的資料轉換所致。例如,如果以相等的機率執行 0 度、90 度、180 度或 270 度旋轉,則原始影像的方向將無法推斷,並且此資訊將被破壞。
使資料擴增可逆的一個簡單技巧是以一定的機率僅應用它們。這樣一來,影像的原始版本將更為常見,並且可以推斷出資料分佈。透過正確選擇此機率,可以有效地正規化鑑別器,而不會使擴增洩漏。
設定
import os

os.environ["KERAS_BACKEND"] = "tensorflow"

import matplotlib.pyplot as plt
import tensorflow as tf
import tensorflow_datasets as tfds

import keras
from keras import ops
from keras import layers
WARNING: All log messages before absl::InitializeLog() is called are written to STDERR
E0000 00:00:1738798965.367584   17795 cuda_dnn.cc:8310] Unable to register cuDNN factory: Attempting to register factory for plugin cuDNN when one has already been registered
E0000 00:00:1738798965.374084   17795 cuda_blas.cc:1418] Unable to register cuBLAS factory: Attempting to register factory for plugin cuBLAS when one has already been registered
超參數
# data
num_epochs = 10  # train for 400 epochs for good results
image_size = 64
# resolution of Kernel Inception Distance measurement, see related section
kid_image_size = 75
padding = 0.25
dataset_name = "caltech_birds2011"

# adaptive discriminator augmentation
max_translation = 0.125
max_rotation = 0.125
max_zoom = 0.25
target_accuracy = 0.85
integration_steps = 1000

# architecture
noise_size = 64
depth = 4
width = 128
leaky_relu_slope = 0.2
dropout_rate = 0.4

# optimization
batch_size = 128
learning_rate = 2e-4
beta_1 = 0.5  # not using the default value of 0.9 is important
ema = 0.99
資料管線
在此範例中,我們將使用 Caltech Birds (2011) 資料集來生成鳥類影像,這是一個包含少於 6000 張訓練影像的多樣化自然資料集。當處理如此少量的資料時,必須格外小心以盡可能保留高資料品質。在此範例中,我們使用提供的鳥類邊界框,以方形裁剪方式裁剪它們,同時在可能的情況下保留其長寬比。
def round_to_int(float_value):
    return ops.cast(ops.round(float_value), "int32")


def preprocess_image(data):
    # unnormalize bounding box coordinates
    height = ops.cast(ops.shape(data["image"])[0], "float32")
    width = ops.cast(ops.shape(data["image"])[1], "float32")
    bounding_box = data["bbox"] * ops.stack([height, width, height, width])

    # calculate center and length of longer side, add padding
    target_center_y = 0.5 * (bounding_box[0] + bounding_box[2])
    target_center_x = 0.5 * (bounding_box[1] + bounding_box[3])
    target_size = ops.maximum(
        (1.0 + padding) * (bounding_box[2] - bounding_box[0]),
        (1.0 + padding) * (bounding_box[3] - bounding_box[1]),
    )

    # modify crop size to fit into image
    target_height = ops.min(
        [target_size, 2.0 * target_center_y, 2.0 * (height - target_center_y)]
    )
    target_width = ops.min(
        [target_size, 2.0 * target_center_x, 2.0 * (width - target_center_x)]
    )

    # crop image, `ops.image.crop_images` only works with non-tensor croppings
    image = ops.slice(
        data["image"],
        start_indices=(
            round_to_int(target_center_y - 0.5 * target_height),
            round_to_int(target_center_x - 0.5 * target_width),
            0,
        ),
        shape=(round_to_int(target_height), round_to_int(target_width), 3),
    )

    # resize and clip
    image = ops.cast(image, "float32")
    image = ops.image.resize(image, [image_size, image_size])

    return ops.clip(image / 255.0, 0.0, 1.0)


def prepare_dataset(split):
    # the validation dataset is shuffled as well, because data order matters
    # for the KID calculation
    return (
        tfds.load(dataset_name, split=split, shuffle_files=True)
        .map(preprocess_image, num_parallel_calls=tf.data.AUTOTUNE)
        .cache()
        .shuffle(10 * batch_size)
        .batch(batch_size, drop_remainder=True)
        .prefetch(buffer_size=tf.data.AUTOTUNE)
    )


train_dataset = prepare_dataset("train")
val_dataset = prepare_dataset("test")
I0000 00:00:1738798971.054632 17795 gpu_device.cc:2022] Created device /job:localhost/replica:0/task:0/device:GPU:0 with 13840 MB memory: -> device: 0, name: Tesla T4, pci bus id: 0000:00:04.0, compute capability: 7.5
預處理後,訓練影像看起來如下所示: 
核心啟發距離
核心啟發距離 (KID) 被提出來作為流行的 Frechet 啟發距離 (FID) 指標的替代品,用於衡量影像生成品質。這兩個指標都衡量在 InceptionV3 網路的表示空間中,生成的分佈與訓練分佈之間的差異,該網路在 ImageNet 上進行了預訓練。
根據該論文,提出 KID 是因為 FID 沒有無偏估計器,當在較少的影像上測量時,其期望值較高。KID 更適合小型資料集,因為其期望值不取決於測量的樣本數量。根據我的經驗,它在計算上也更輕巧、數值上更穩定,並且更易於實作,因為它可以按批次方式進行估計。
在此範例中,影像在 Inception 網路的最小可能解析度 (75x75 而非 299x299) 下進行評估,並且該指標僅在驗證集上進行測量,以提高計算效率。
class KID(keras.metrics.Metric):
    def __init__(self, name="kid", **kwargs):
        super().__init__(name=name, **kwargs)

        # KID is estimated per batch and is averaged across batches
        self.kid_tracker = keras.metrics.Mean()

        # a pretrained InceptionV3 is used without its classification layer
        # transform the pixel values to the 0-255 range, then use the same
        # preprocessing as during pretraining
        self.encoder = keras.Sequential(
            [
                layers.InputLayer(input_shape=(image_size, image_size, 3)),
                layers.Rescaling(255.0),
                layers.Resizing(height=kid_image_size, width=kid_image_size),
                layers.Lambda(keras.applications.inception_v3.preprocess_input),
                keras.applications.InceptionV3(
                    include_top=False,
                    input_shape=(kid_image_size, kid_image_size, 3),
                    weights="imagenet",
                ),
                layers.GlobalAveragePooling2D(),
            ],
            name="inception_encoder",
        )

    def polynomial_kernel(self, features_1, features_2):
        feature_dimensions = ops.cast(ops.shape(features_1)[1], "float32")
        return (
            features_1 @ ops.transpose(features_2) / feature_dimensions + 1.0
        ) ** 3.0

    def update_state(self, real_images, generated_images, sample_weight=None):
        real_features = self.encoder(real_images, training=False)
        generated_features = self.encoder(generated_images, training=False)

        # compute polynomial kernels using the two sets of features
        kernel_real = self.polynomial_kernel(real_features, real_features)
        kernel_generated = self.polynomial_kernel(
            generated_features, generated_features
        )
        kernel_cross = self.polynomial_kernel(real_features, generated_features)

        # estimate the squared maximum mean discrepancy using the average kernel values
        batch_size = ops.shape(real_features)[0]
        batch_size_f = ops.cast(batch_size, "float32")
        mean_kernel_real = ops.sum(kernel_real * (1.0 - ops.eye(batch_size))) / (
            batch_size_f * (batch_size_f - 1.0)
        )
        mean_kernel_generated = ops.sum(
            kernel_generated * (1.0 - ops.eye(batch_size))
        ) / (batch_size_f * (batch_size_f - 1.0))
        mean_kernel_cross = ops.mean(kernel_cross)
        kid = mean_kernel_real + mean_kernel_generated - 2.0 * mean_kernel_cross

        # update the average KID estimate
        self.kid_tracker.update_state(kid)

    def result(self):
        return self.kid_tracker.result()

    def reset_state(self):
        self.kid_tracker.reset_state()
適應性鑑別器擴增
StyleGAN2-ADA 的作者建議在訓練期間自適應地更改擴增機率。儘管在論文中對此進行了不同的解釋,但他們在擴增機率上使用了 積分控制,以使鑑別器在真實影像上的準確度接近目標值。請注意,他們控制的變數實際上是鑑別器 logits 的平均符號(論文中的 r_t),它對應於 2 * 準確度 - 1。
此方法需要兩個超參數
target_accuracy:鑑別器在真實影像上的準確度的目標值。我建議從 80-90% 的範圍內選擇其值。integration_steps:將 100% 的準確度誤差轉換為 100% 的擴增機率增加所需的更新步驟數。直觀地說,這定義了擴增機率變化的速度有多慢。我建議將此值設定為相對較高的值(在本例中為 1000),以便僅緩慢調整擴增強度。
此程序的主要動機是,目標準確度的最佳值在不同的資料集大小之間是相似的(請參閱 論文中的圖 4 和圖 5),因此不必重新調整,因為該過程會在需要時自動應用更強的資料擴增。
# "hard sigmoid", useful for binary accuracy calculation from logits
def step(values):
    # negative values -> 0.0, positive values -> 1.0
    return 0.5 * (1.0 + ops.sign(values))


# augments images with a probability that is dynamically updated during training
class AdaptiveAugmenter(keras.Model):
    def __init__(self):
        super().__init__()

        # stores the current probability of an image being augmented
        self.probability = keras.Variable(0.0)
        self.seed_generator = keras.random.SeedGenerator(42)

        # the corresponding augmentation names from the paper are shown above each layer
        # the authors show (see figure 4), that the blitting and geometric augmentations
        # are the most helpful in the low-data regime
        self.augmenter = keras.Sequential(
            [
                layers.InputLayer(input_shape=(image_size, image_size, 3)),
                # blitting/x-flip:
                layers.RandomFlip("horizontal"),
                # blitting/integer translation:
                layers.RandomTranslation(
                    height_factor=max_translation,
                    width_factor=max_translation,
                    interpolation="nearest",
                ),
                # geometric/rotation:
                layers.RandomRotation(factor=max_rotation),
                # geometric/isotropic and anisotropic scaling:
                layers.RandomZoom(
                    height_factor=(-max_zoom, 0.0), width_factor=(-max_zoom, 0.0)
                ),
            ],
            name="adaptive_augmenter",
        )

    def call(self, images, training):
        if training:
            augmented_images = self.augmenter(images, training=training)

            # during training either the original or the augmented images are selected
            # based on self.probability
            augmentation_values = keras.random.uniform(
                shape=(batch_size, 1, 1, 1), seed=self.seed_generator
            )
            augmentation_bools = ops.less(augmentation_values, self.probability)

            images = ops.where(augmentation_bools, augmented_images, images)
        return images

    def update(self, real_logits):
        current_accuracy = ops.mean(step(real_logits))

        # the augmentation probability is updated based on the discriminator's
        # accuracy on real images
        accuracy_error = current_accuracy - target_accuracy
        self.probability.assign(
            ops.clip(self.probability + accuracy_error / integration_steps, 0.0, 1.0)
        )
網路架構
在這裡,我們指定了兩個網路的架構
- 生成器:將隨機向量對應到影像,該影像應盡可能逼真
- 鑑別器:將影像對應到純量分數,真實影像的分數應高,而生成影像的分數應低
GAN 傾向於對網路架構敏感,我在本範例中實作了 DCGAN 架構,因為它在訓練期間相對穩定,同時易於實作。我們在整個網路中使用恆定數量的濾波器,在生成器的最後一層中使用 sigmoid 而不是 tanh,並使用預設初始化而不是隨機常態作為進一步的簡化。
作為一種良好的實務,我們停用了批次正規化層中可學習的縮放參數,因為一方面,後續的 relu + 卷積層使其變得多餘(如 文件 中所述)。但也是因為當使用 譜正規化(第 4.1 節) 時,應根據理論停用它,譜正規化在此處未使用,但在 GAN 中很常見。我們也停用了完全連接層和卷積層中的偏差,因為後續的批次正規化使其變得多餘。
# DCGAN generator
def get_generator():
    noise_input = keras.Input(shape=(noise_size,))
    x = layers.Dense(4 * 4 * width, use_bias=False)(noise_input)
    x = layers.BatchNormalization(scale=False)(x)
    x = layers.ReLU()(x)
    x = layers.Reshape(target_shape=(4, 4, width))(x)
    for _ in range(depth - 1):
        x = layers.Conv2DTranspose(
            width,
            kernel_size=4,
            strides=2,
            padding="same",
            use_bias=False,
        )(x)
        x = layers.BatchNormalization(scale=False)(x)
        x = layers.ReLU()(x)
    image_output = layers.Conv2DTranspose(
        3,
        kernel_size=4,
        strides=2,
        padding="same",
        activation="sigmoid",
    )(x)

    return keras.Model(noise_input, image_output, name="generator")


# DCGAN discriminator
def get_discriminator():
    image_input = keras.Input(shape=(image_size, image_size, 3))
    x = image_input
    for _ in range(depth):
        x = layers.Conv2D(
            width,
            kernel_size=4,
            strides=2,
            padding="same",
            use_bias=False,
        )(x)
        x = layers.BatchNormalization(scale=False)(x)
        x = layers.LeakyReLU(alpha=leaky_relu_slope)(x)
    x = layers.Flatten()(x)
    x = layers.Dropout(dropout_rate)(x)
    output_score = layers.Dense(1)(x)

    return keras.Model(image_input, output_score, name="discriminator")
GAN 模型
class GAN_ADA(keras.Model):
    def __init__(self):
        super().__init__()

        self.seed_generator = keras.random.SeedGenerator(seed=42)
        self.augmenter = AdaptiveAugmenter()
        self.generator = get_generator()
        self.ema_generator = keras.models.clone_model(self.generator)
        self.discriminator = get_discriminator()

        self.generator.summary()
        self.discriminator.summary()
        # we have created all layers at this point, so we can mark the model
        # as having been built
        self.built = True

    def compile(self, generator_optimizer, discriminator_optimizer, **kwargs):
        super().compile(**kwargs)

        # separate optimizers for the two networks
        self.generator_optimizer = generator_optimizer
        self.discriminator_optimizer = discriminator_optimizer

        self.generator_loss_tracker = keras.metrics.Mean(name="g_loss")
        self.discriminator_loss_tracker = keras.metrics.Mean(name="d_loss")
        self.real_accuracy = keras.metrics.BinaryAccuracy(name="real_acc")
        self.generated_accuracy = keras.metrics.BinaryAccuracy(name="gen_acc")
        self.augmentation_probability_tracker = keras.metrics.Mean(name="aug_p")
        self.kid = KID()

    @property
    def metrics(self):
        return [
            self.generator_loss_tracker,
            self.discriminator_loss_tracker,
            self.real_accuracy,
            self.generated_accuracy,
            self.augmentation_probability_tracker,
            self.kid,
        ]

    def generate(self, batch_size, training):
        latent_samples = keras.random.normal(
            shape=(batch_size, noise_size), seed=self.seed_generator
        )
        # use ema_generator during inference
        if training:
            generated_images = self.generator(latent_samples, training=training)
        else:
            generated_images = self.ema_generator(latent_samples, training=training)
        return generated_images

    def adversarial_loss(self, real_logits, generated_logits):
        # this is usually called the non-saturating GAN loss

        real_labels = ops.ones(shape=(batch_size, 1))
        generated_labels = ops.zeros(shape=(batch_size, 1))

        # the generator tries to produce images that the discriminator considers as real
        generator_loss = keras.losses.binary_crossentropy(
            real_labels, generated_logits, from_logits=True
        )
        # the discriminator tries to determine if images are real or generated
        discriminator_loss = keras.losses.binary_crossentropy(
            ops.concatenate([real_labels, generated_labels], axis=0),
            ops.concatenate([real_logits, generated_logits], axis=0),
            from_logits=True,
        )

        return ops.mean(generator_loss), ops.mean(discriminator_loss)

    def train_step(self, real_images):
        real_images = self.augmenter(real_images, training=True)

        # use persistent gradient tape because gradients will be calculated twice
        with tf.GradientTape(persistent=True) as tape:
            generated_images = self.generate(batch_size, training=True)
            # gradient is calculated through the image augmentation
            generated_images = self.augmenter(generated_images, training=True)

            # separate forward passes for the real and generated images, meaning
            # that batch normalization is applied separately
            real_logits = self.discriminator(real_images, training=True)
            generated_logits = self.discriminator(generated_images, training=True)

            generator_loss, discriminator_loss = self.adversarial_loss(
                real_logits, generated_logits
            )

        # calculate gradients and update weights
        generator_gradients = tape.gradient(
            generator_loss, self.generator.trainable_weights
        )
        discriminator_gradients = tape.gradient(
            discriminator_loss, self.discriminator.trainable_weights
        )
        self.generator_optimizer.apply_gradients(
            zip(generator_gradients, self.generator.trainable_weights)
        )
        self.discriminator_optimizer.apply_gradients(
            zip(discriminator_gradients, self.discriminator.trainable_weights)
        )

        # update the augmentation probability based on the discriminator's performance
        self.augmenter.update(real_logits)

        self.generator_loss_tracker.update_state(generator_loss)
        self.discriminator_loss_tracker.update_state(discriminator_loss)
        self.real_accuracy.update_state(1.0, step(real_logits))
        self.generated_accuracy.update_state(0.0, step(generated_logits))
        self.augmentation_probability_tracker.update_state(self.augmenter.probability)

        # track the exponential moving average of the generator's weights to decrease
        # variance in the generation quality
        for weight, ema_weight in zip(
            self.generator.weights, self.ema_generator.weights
        ):
            ema_weight.assign(ema * ema_weight + (1 - ema) * weight)

        # KID is not measured during the training phase for computational efficiency
        return {m.name: m.result() for m in self.metrics[:-1]}

    def test_step(self, real_images):
        generated_images = self.generate(batch_size, training=False)

        self.kid.update_state(real_images, generated_images)

        # only KID is measured during the evaluation phase for computational efficiency
        return {self.kid.name: self.kid.result()}

    def plot_images(self, epoch=None, logs=None, num_rows=3, num_cols=6, interval=5):
        # plot random generated images for visual evaluation of generation quality
        if epoch is None or (epoch + 1) % interval == 0:
            num_images = num_rows * num_cols
            generated_images = self.generate(num_images, training=False)

            plt.figure(figsize=(num_cols * 2.0, num_rows * 2.0))
            for row in range(num_rows):
                for col in range(num_cols):
                    index = row * num_cols + col
                    plt.subplot(num_rows, num_cols, index + 1)
                    plt.imshow(generated_images[index])
                    plt.axis("off")
            plt.tight_layout()
            plt.show()
            plt.close()
訓練
可以從訓練期間的指標中看出,如果真實準確度(鑑別器在真實影像上的準確度)低於目標準確度,則擴增機率會增加,反之亦然。根據我的經驗,在健康的 GAN 訓練期間,鑑別器準確度應保持在 80-95% 的範圍內。低於該值,鑑別器太弱,高於該值,鑑別器太強。
請注意,我們追蹤生成器權重的指數移動平均值,並將其用於影像生成和 KID 評估。
# create and compile the model
model = GAN_ADA()
model.compile(
    generator_optimizer=keras.optimizers.Adam(learning_rate, beta_1),
    discriminator_optimizer=keras.optimizers.Adam(learning_rate, beta_1),
)

# save the best model based on the validation KID metric
checkpoint_path = "gan_model.weights.h5"
checkpoint_callback = keras.callbacks.ModelCheckpoint(
    filepath=checkpoint_path,
    save_weights_only=True,
    monitor="val_kid",
    mode="min",
    save_best_only=True,
)

# run training and plot generated images periodically
model.fit(
    train_dataset,
    epochs=num_epochs,
    validation_data=val_dataset,
    callbacks=[
        keras.callbacks.LambdaCallback(on_epoch_end=model.plot_images),
        checkpoint_callback,
    ],
)
/usr/local/lib/python3.11/dist-packages/keras/src/layers/core/input_layer.py:27: UserWarning: Argument `input_shape` is deprecated. Use `shape` instead.
  warnings.warn(

/usr/local/lib/python3.11/dist-packages/keras/src/layers/activations/leaky_relu.py:41: UserWarning: Argument `alpha` is deprecated. Use `negative_slope` instead.
  warnings.warn(
Model: "generator"
┏━━━━━━━━━━━━━━━━━━━━━━━━━━━━━━━━━┳━━━━━━━━━━━━━━━━━━━━━━━━┳━━━━━━━━━━━━━━━┓
┃ Layer (type)                    ┃ Output Shape           ┃       Param # ┃
┡━━━━━━━━━━━━━━━━━━━━━━━━━━━━━━━━━╇━━━━━━━━━━━━━━━━━━━━━━━━╇━━━━━━━━━━━━━━━┩
│ input_layer_1 (InputLayer)      │ (None, 64)             │             0 │
├─────────────────────────────────┼────────────────────────┼───────────────┤
│ dense (Dense)                   │ (None, 2048)           │       131,072 │
├─────────────────────────────────┼────────────────────────┼───────────────┤
│ batch_normalization             │ (None, 2048)           │         6,144 │
│ (BatchNormalization)            │                        │               │
├─────────────────────────────────┼────────────────────────┼───────────────┤
│ re_lu (ReLU)                    │ (None, 2048)           │             0 │
├─────────────────────────────────┼────────────────────────┼───────────────┤
│ reshape (Reshape)               │ (None, 4, 4, 128)      │             0 │
├─────────────────────────────────┼────────────────────────┼───────────────┤
│ conv2d_transpose                │ (None, 8, 8, 128)      │       262,144 │
│ (Conv2DTranspose)               │                        │               │
├─────────────────────────────────┼────────────────────────┼───────────────┤
│ batch_normalization_1           │ (None, 8, 8, 128)      │           384 │
│ (BatchNormalization)            │                        │               │
├─────────────────────────────────┼────────────────────────┼───────────────┤
│ re_lu_1 (ReLU)                  │ (None, 8, 8, 128)      │             0 │
├─────────────────────────────────┼────────────────────────┼───────────────┤
│ conv2d_transpose_1              │ (None, 16, 16, 128)    │       262,144 │
│ (Conv2DTranspose)               │                        │               │
├─────────────────────────────────┼────────────────────────┼───────────────┤
│ batch_normalization_2           │ (None, 16, 16, 128)    │           384 │
│ (BatchNormalization)            │                        │               │
├─────────────────────────────────┼────────────────────────┼───────────────┤
│ re_lu_2 (ReLU)                  │ (None, 16, 16, 128)    │             0 │
├─────────────────────────────────┼────────────────────────┼───────────────┤
│ conv2d_transpose_2              │ (None, 32, 32, 128)    │       262,144 │
│ (Conv2DTranspose)               │                        │               │
├─────────────────────────────────┼────────────────────────┼───────────────┤
│ batch_normalization_3           │ (None, 32, 32, 128)    │           384 │
│ (BatchNormalization)            │                        │               │
├─────────────────────────────────┼────────────────────────┼───────────────┤
│ re_lu_3 (ReLU)                  │ (None, 32, 32, 128)    │             0 │
├─────────────────────────────────┼────────────────────────┼───────────────┤
│ conv2d_transpose_3              │ (None, 64, 64, 3)      │         6,147 │
│ (Conv2DTranspose)               │                        │               │
└─────────────────────────────────┴────────────────────────┴───────────────┘
Total params: 930,947 (3.55 MB)
Trainable params: 926,083 (3.53 MB)
Non-trainable params: 4,864 (19.00 KB)
Model: "discriminator"
┏━━━━━━━━━━━━━━━━━━━━━━━━━━━━━━━━━┳━━━━━━━━━━━━━━━━━━━━━━━━┳━━━━━━━━━━━━━━━┓
┃ Layer (type)                    ┃ Output Shape           ┃       Param # ┃
┡━━━━━━━━━━━━━━━━━━━━━━━━━━━━━━━━━╇━━━━━━━━━━━━━━━━━━━━━━━━╇━━━━━━━━━━━━━━━┩
│ input_layer_2 (InputLayer)      │ (None, 64, 64, 3)      │             0 │
├─────────────────────────────────┼────────────────────────┼───────────────┤
│ conv2d (Conv2D)                 │ (None, 32, 32, 128)    │         6,144 │
├─────────────────────────────────┼────────────────────────┼───────────────┤
│ batch_normalization_4           │ (None, 32, 32, 128)    │           384 │
│ (BatchNormalization)            │                        │               │
├─────────────────────────────────┼────────────────────────┼───────────────┤
│ leaky_re_lu (LeakyReLU)         │ (None, 32, 32, 128)    │             0 │
├─────────────────────────────────┼────────────────────────┼───────────────┤
│ conv2d_1 (Conv2D)               │ (None, 16, 16, 128)    │       262,144 │
├─────────────────────────────────┼────────────────────────┼───────────────┤
│ batch_normalization_5           │ (None, 16, 16, 128)    │           384 │
│ (BatchNormalization)            │                        │               │
├─────────────────────────────────┼────────────────────────┼───────────────┤
│ leaky_re_lu_1 (LeakyReLU)       │ (None, 16, 16, 128)    │             0 │
├─────────────────────────────────┼────────────────────────┼───────────────┤
│ conv2d_2 (Conv2D)               │ (None, 8, 8, 128)      │       262,144 │
├─────────────────────────────────┼────────────────────────┼───────────────┤
│ batch_normalization_6           │ (None, 8, 8, 128)      │           384 │
│ (BatchNormalization)            │                        │               │
├─────────────────────────────────┼────────────────────────┼───────────────┤
│ leaky_re_lu_2 (LeakyReLU)       │ (None, 8, 8, 128)      │             0 │
├─────────────────────────────────┼────────────────────────┼───────────────┤
│ conv2d_3 (Conv2D)               │ (None, 4, 4, 128)      │       262,144 │
├─────────────────────────────────┼────────────────────────┼───────────────┤
│ batch_normalization_7           │ (None, 4, 4, 128)      │           384 │
│ (BatchNormalization)            │                        │               │
├─────────────────────────────────┼────────────────────────┼───────────────┤
│ leaky_re_lu_3 (LeakyReLU)       │ (None, 4, 4, 128)      │             0 │
├─────────────────────────────────┼────────────────────────┼───────────────┤
│ flatten (Flatten)               │ (None, 2048)           │             0 │
├─────────────────────────────────┼────────────────────────┼───────────────┤
│ dropout (Dropout)               │ (None, 2048)           │             0 │
├─────────────────────────────────┼────────────────────────┼───────────────┤
│ dense_1 (Dense)                 │ (None, 1)              │         2,049 │
└─────────────────────────────────┴────────────────────────┴───────────────┘
Total params: 796,161 (3.04 MB)
Trainable params: 795,137 (3.03 MB)
Non-trainable params: 1,024 (4.00 KB)
Downloading data from https://storage.googleapis.com/tensorflow/keras-applications/inception_v3/inception_v3_weights_tf_dim_ordering_tf_kernels_notop.h5
0/87910968 [37m━━━━━━━━━━━━━━━━━━━━ 0s 0s/step
4202496/87910968 [37m━━━━━━━━━━━━━━━━━━━━ 1 秒 0 微秒/步
12304384/87910968 ━━ [37m━━━━━━━━━━━━━━━━━━ 0 秒 0 微秒/步
21815296/87910968 ━━━━ [37m━━━━━━━━━━━━━━━━ 0 秒 0 微秒/步
34373632/87910968 ━━━━━━━ [37m━━━━━━━━━━━━━ 0 秒 0 微秒/步
47669248/87910968 ━━━━━━━━━━ [37m━━━━━━━━━━ 0 秒 0 微秒/步
62324736/87910968 ━━━━━━━━━━━━━━ [37m━━━━━━ 0 秒 0 微秒/步
72032256/87910968 ━━━━━━━━━━━━━━━━ [37m━━━━ 0 秒 0 微秒/步
82083840/87910968 ━━━━━━━━━━━━━━━━━━ [37m━━ 0 秒 0 微秒/步
87910968/87910968 ━━━━━━━━━━━━━━━━━━━━ 0 秒 0 微秒/步
Epoch 1/10

E0000 00:00:1738798983.901596   17795 meta_optimizer.cc:966] layout failed: INVALID_ARGUMENT: Size of values 0 does not match size of permutation 4 @ fanin shape inStatefulPartitionedCall/gradient_tape/adaptive_augmenter_3/SelectV2_1-1-TransposeNHWCToNCHW-LayoutOptimizer

WARNING: All log messages before absl::InitializeLog() is called are written to STDERR
I0000 00:00:1738798987.822990   17861 cuda_solvers.cc:178] Creating GpuSolver handles for stream 0x9f45670

I0000 00:00:1738798988.976919   17862 cuda_dnn.cc:529] Loaded cuDNN version 90300
1/46 [37m━━━━━━━━━━━━━━━━━━━━ 13:22 18 秒/步 - aug_p: 0.0000e+00 - d_loss: 0.8829 - g_loss: 0.5585 - gen_acc: 0.2812 - real_acc: 0.7031
2/46 [37m━━━━━━━━━━━━━━━━━━━━ 7 秒 173 毫秒/步 - aug_p: 0.0000e+00 - d_loss: 0.7985 - g_loss: 0.8154 - gen_acc: 0.4258 - real_acc: 0.6777
3/46 ━ [37m━━━━━━━━━━━━━━━━━━━ 8 秒 201 毫秒/步 - aug_p: 0.0000e+00 - d_loss: 0.7488 - g_loss: 0.9481 - gen_acc: 0.5052 - real_acc: 0.6680
4/46 ━ [37m━━━━━━━━━━━━━━━━━━━ 10 秒 249 毫秒/步 - aug_p: 0.0000e+00 - d_loss: 0.7106 - g_loss: 1.0407 - gen_acc: 0.5586 - real_acc: 0.6680
5/46 ━━ [37m━━━━━━━━━━━━━━━━━━ 11 秒 269 毫秒/步 - aug_p: 0.0000e+00 - d_loss: 0.6782 - g_loss: 1.1104 - gen_acc: 0.5991 - real_acc: 0.6744
6/46 ━━ [37m━━━━━━━━━━━━━━━━━━ 10 秒 273 毫秒/步 - aug_p: 0.0000e+00 - d_loss: 0.6506 - g_loss: 1.1692 - gen_acc: 0.6301 - real_acc: 0.6818
7/46 ━━━ [37m━━━━━━━━━━━━━━━━━ 10 秒 280 毫秒/步 - aug_p: 5.1020e-07 - d_loss: 0.6253 - g_loss: 1.2302 - gen_acc: 0.6558 - real_acc: 0.6902
8/46 ━━━ [37m━━━━━━━━━━━━━━━━━ 10 秒 289 毫秒/步 - aug_p: 1.4962e-06 - d_loss: 0.6030 - g_loss: 1.2838 - gen_acc: 0.6772 - real_acc: 0.6986
9/46 ━━━ [37m━━━━━━━━━━━━━━━━━ 10 秒 297 毫秒/步 - aug_p: 3.8570e-06 - d_loss: 0.5829 - g_loss: 1.3313 - gen_acc: 0.6952 - real_acc: 0.7074
10/46 ━━━━ [37m━━━━━━━━━━━━━━━━ 10 秒 299 毫秒/步 - aug_p: 7.9244e-06 - d_loss: 0.5644 - g_loss: 1.3805 - gen_acc: 0.7109 - real_acc: 0.7162
11/46 ━━━━ [37m━━━━━━━━━━━━━━━━ 11 秒 314 毫秒/步 - aug_p: 1.3531e-05 - d_loss: 0.5473 - g_loss: 1.4301 - gen_acc: 0.7249 - real_acc: 0.7245
12/46 ━━━━━ [37m━━━━━━━━━━━━━━━ 11 秒 333 毫秒/步 - aug_p: 2.0444e-05 - d_loss: 0.5318 - g_loss: 1.4743 - gen_acc: 0.7373 - real_acc: 0.7322
13/46 ━━━━━ [37m━━━━━━━━━━━━━━━ 11 秒 352 毫秒/步 - aug_p: 2.8561e-05 - d_loss: 0.5174 - g_loss: 1.5181 - gen_acc: 0.7485 - real_acc: 0.7394
14/46 ━━━━━━ [37m━━━━━━━━━━━━━━ 11 秒 365 毫秒/步 - aug_p: 3.7929e-05 - d_loss: 0.5040 - g_loss: 1.5586 - gen_acc: 0.7587 - real_acc: 0.7464
15/46 ━━━━━━ [37m━━━━━━━━━━━━━━ 11 秒 379 毫秒/步 - aug_p: 4.8560e-05 - d_loss: 0.4914 - g_loss: 1.5977 - gen_acc: 0.7680 - real_acc: 0.7530
16/46 ━━━━━━ [37m━━━━━━━━━━━━━━ 11 秒 387 毫秒/步 - aug_p: 6.0448e-05 - d_loss: 0.4795 - g_loss: 1.6355 - gen_acc: 0.7766 - real_acc: 0.7593
17/46 ━━━━━━━ [37m━━━━━━━━━━━━━ 11 秒 399 毫秒/步 - aug_p: 7.3577e-05 - d_loss: 0.4683 - g_loss: 1.6715 - gen_acc: 0.7844 - real_acc: 0.7654
18/46 ━━━━━━━ [37m━━━━━━━━━━━━━ 11 秒 414 毫秒/步 - aug_p: 8.7805e-05 - d_loss: 0.4578 - g_loss: 1.7063 - gen_acc: 0.7917 - real_acc: 0.7711
19/46 ━━━━━━━━ [37m━━━━━━━━━━━━ 11 秒 422 毫秒/步 - aug_p: 1.0308e-04 - d_loss: 0.4480 - g_loss: 1.7386 - gen_acc: 0.7984 - real_acc: 0.7765
20/46 ━━━━━━━━ [37m━━━━━━━━━━━━ 11 秒 433 毫秒/步 - aug_p: 1.1933e-04 - d_loss: 0.4386 - g_loss: 1.7736 - gen_acc: 0.8046 - real_acc: 0.7817
21/46 ━━━━━━━━━ [37m━━━━━━━━━━━ 11 秒 444 毫秒/步 - aug_p: 1.3652e-04 - d_loss: 0.4297 - g_loss: 1.8065 - gen_acc: 0.8104 - real_acc: 0.7866
22/46 ━━━━━━━━━ [37m━━━━━━━━━━━ 10 秒 440 毫秒/步 - aug_p: 1.5459e-04 - d_loss: 0.4213 - g_loss: 1.8383 - gen_acc: 0.8158 - real_acc: 0.7913
23/46 ━━━━━━━━━━ [37m━━━━━━━━━━ 9 秒 434 毫秒/步 - aug_p: 1.7347e-04 - d_loss: 0.4132 - g_loss: 1.8694 - gen_acc: 0.8209 - real_acc: 0.7958
24/46 ━━━━━━━━━━ [37m━━━━━━━━━━ 9 秒 429 毫秒/步 - aug_p: 1.9312e-04 - d_loss: 0.4056 - g_loss: 1.8988 - gen_acc: 0.8257 - real_acc: 0.8000
25/46 ━━━━━━━━━━ [37m━━━━━━━━━━ 8 秒 426 毫秒/步 - aug_p: 2.1348e-04 - d_loss: 0.3983 - g_loss: 1.9278 - gen_acc: 0.8302 - real_acc: 0.8041
26/46 ━━━━━━━━━━━ [37m━━━━━━━━━ 8 秒 423 毫秒/步 - aug_p: 2.3451e-04 - d_loss: 0.3914 - g_loss: 1.9548 - gen_acc: 0.8345 - real_acc: 0.8079
27/46 ━━━━━━━━━━━ [37m━━━━━━━━━ 8 秒 427 毫秒/步 - aug_p: 2.5614e-04 - d_loss: 0.3848 - g_loss: 1.9828 - gen_acc: 0.8385 - real_acc: 0.8116
28/46 ━━━━━━━━━━━━ [37m━━━━━━━━ 7 秒 424 毫秒/步 - aug_p: 2.7834e-04 - d_loss: 0.3785 - g_loss: 2.0093 - gen_acc: 0.8423 - real_acc: 0.8151
29/46 ━━━━━━━━━━━━ [37m━━━━━━━━ 7 秒 420 毫秒/步 - aug_p: 3.0107e-04 - d_loss: 0.3724 - g_loss: 2.0347 - gen_acc: 0.8459 - real_acc: 0.8185
30/46 ━━━━━━━━━━━━━ [37m━━━━━━━ 6 秒 416 毫秒/步 - aug_p: 3.2432e-04 - d_loss: 0.3666 - g_loss: 2.0599 - gen_acc: 0.8493 - real_acc: 0.8218
31/46 ━━━━━━━━━━━━━ [37m━━━━━━━ 6 秒 413 毫秒/步 - aug_p: 3.4806e-04 - d_loss: 0.3610 - g_loss: 2.0840 - gen_acc: 0.8526 - real_acc: 0.8249
32/46 ━━━━━━━━━━━━━ [37m━━━━━━━ 5 秒 409 毫秒/步 - aug_p: 3.7225e-04 - d_loss: 0.3556 - g_loss: 2.1073 - gen_acc: 0.8556 - real_acc: 0.8279
33/46 ━━━━━━━━━━━━━━ [37m━━━━━━ 5 秒 406 毫秒/步 - aug_p: 3.9686e-04 - d_loss: 0.3505 - g_loss: 2.1300 - gen_acc: 0.8586 - real_acc: 0.8307
34/46 ━━━━━━━━━━━━━━ [37m━━━━━━ 4 秒 402 毫秒/步 - aug_p: 4.2187e-04 - d_loss: 0.3455 - g_loss: 2.1520 - gen_acc: 0.8614 - real_acc: 0.8335
35/46 ━━━━━━━━━━━━━━━ [37m━━━━━ 4 秒 400 毫秒/步 - aug_p: 4.4725e-04 - d_loss: 0.3407 - g_loss: 2.1736 - gen_acc: 0.8641 - real_acc: 0.8361
36/46 ━━━━━━━━━━━━━━━ [37m━━━━━ 3 秒 397 毫秒/步 - aug_p: 4.7297e-04 - d_loss: 0.3361 - g_loss: 2.1947 - gen_acc: 0.8667 - real_acc: 0.8387
37/46 ━━━━━━━━━━━━━━━━ [37m━━━━ 3 秒 393 毫秒/步 - aug_p: 4.9903e-04 - d_loss: 0.3316 - g_loss: 2.2152 - gen_acc: 0.8691 - real_acc: 0.8411
38/46 ━━━━━━━━━━━━━━━━ [37m━━━━ 3 秒 387 毫秒/步 - aug_p: 5.2539e-04 - d_loss: 0.3273 - g_loss: 2.2357 - gen_acc: 0.8715 - real_acc: 0.8435
39/46 ━━━━━━━━━━━━━━━━ [37m━━━━ 2 秒 382 毫秒/步 - aug_p: 5.5206e-04 - d_loss: 0.3231 - g_loss: 2.2554 - gen_acc: 0.8738 - real_acc: 0.8458
40/46 ━━━━━━━━━━━━━━━━━ [37m━━━ 2 秒 376 毫秒/步 - aug_p: 5.7902e-04 - d_loss: 0.3191 - g_loss: 2.2756 - gen_acc: 0.8759 - real_acc: 0.8480
41/46 ━━━━━━━━━━━━━━━━━ [37m━━━ 1 秒 371 毫秒/步 - aug_p: 6.0626e-04 - d_loss: 0.3151 - g_loss: 2.2954 - gen_acc: 0.8780 - real_acc: 0.8502
42/46 ━━━━━━━━━━━━━━━━━━ [37m━━ 1 秒 366 毫秒/步 - aug_p: 6.3377e-04 - d_loss: 0.3113 - g_loss: 2.3147 - gen_acc: 0.8800 - real_acc: 0.8522
43/46 ━━━━━━━━━━━━━━━━━━ [37m━━ 1 秒 362 毫秒/步 - aug_p: 6.6154e-04 - d_loss: 0.3076 - g_loss: 2.3339 - gen_acc: 0.8820 - real_acc: 0.8543
44/46 ━━━━━━━━━━━━━━━━━━━ [37m━ 0 秒 358 毫秒/步 - aug_p: 6.8956e-04 - d_loss: 0.3041 - g_loss: 2.3524 - gen_acc: 0.8839 - real_acc: 0.8562
45/46 ━━━━━━━━━━━━━━━━━━━ [37m━ 0 秒 354 毫秒/步 - aug_p: 7.1780e-04 - d_loss: 0.3006 - g_loss: 2.3703 - gen_acc: 0.8857 - real_acc: 0.8581
46/46 ━━━━━━━━━━━━━━━━━━━━ 0 秒 350 毫秒/步 - aug_p: 7.4625e-04 - d_loss: 0.2973 - g_loss: 2.3871 - gen_acc: 0.8874 - real_acc: 0.8599
46/46 ━━━━━━━━━━━━━━━━━━━━ 61 秒 958 毫秒/步 - aug_p: 7.7349e-04 - d_loss: 0.2942 - g_loss: 2.4032 - gen_acc: 0.8890 - real_acc: 0.8616 - val_kid: 9.1841
Epoch 2/10
1/46 [37m━━━━━━━━━━━━━━━━━━━━ 22:28 30 秒/步 - aug_p: 0.0051 - d_loss: 0.1030 - g_loss: 8.8928 - gen_acc: 1.0000 - real_acc: 0.9375
2/46 [37m━━━━━━━━━━━━━━━━━━━━ 7 秒 176 毫秒/步 - aug_p: 0.0051 - d_loss: 0.1073 - g_loss: 8.4938 - gen_acc: 0.9980 - real_acc: 0.9297
3/46 ━ [37m━━━━━━━━━━━━━━━━━━━ 7 秒 176 毫秒/步 - aug_p: 0.0051 - d_loss: 0.1074 - g_loss: 7.7540 - gen_acc: 0.9952 - real_acc: 0.9340
4/46 ━ [37m━━━━━━━━━━━━━━━━━━━ 7 秒 176 毫秒/步 - aug_p: 0.0052 - d_loss: 0.1037 - g_loss: 7.2815 - gen_acc: 0.9945 - real_acc: 0.9388
5/46 ━━ [37m━━━━━━━━━━━━━━━━━━ 7 秒 175 毫秒/步 - aug_p: 0.0052 - d_loss: 0.0997 - g_loss: 6.9305 - gen_acc: 0.9943 - real_acc: 0.9432
6/46 ━━ [37m━━━━━━━━━━━━━━━━━━ 7 秒 175 毫秒/步 - aug_p: 0.0052 - d_loss: 0.0960 - g_loss: 6.6418 - gen_acc: 0.9942 - real_acc: 0.9473
7/46 ━━━ [37m━━━━━━━━━━━━━━━━━ 6 秒 175 毫秒/步 - aug_p: 0.0052 - d_loss: 0.0933 - g_loss: 6.4224 - gen_acc: 0.9939 - real_acc: 0.9503
8/46 ━━━ [37m━━━━━━━━━━━━━━━━━ 6 秒 175 毫秒/步 - aug_p: 0.0053 - d_loss: 0.0907 - g_loss: 6.2473 - gen_acc: 0.9937 - real_acc: 0.9530
9/46 ━━━ [37m━━━━━━━━━━━━━━━━━ 6 秒 175 毫秒/步 - aug_p: 0.0053 - d_loss: 0.0885 - g_loss: 6.0970 - gen_acc: 0.9936 - real_acc: 0.9552
10/46 ━━━━ [37m━━━━━━━━━━━━━━━━ 6 秒 175 毫秒/步 - aug_p: 0.0053 - d_loss: 0.0868 - g_loss: 5.9686 - gen_acc: 0.9936 - real_acc: 0.9571
11/46 ━━━━ [37m━━━━━━━━━━━━━━━━ 6 秒 175 毫秒/步 - aug_p: 0.0054 - d_loss: 0.0852 - g_loss: 5.8546 - gen_acc: 0.9936 - real_acc: 0.9588
12/46 ━━━━━ [37m━━━━━━━━━━━━━━━ 5 秒 176 毫秒/步 - aug_p: 0.0054 - d_loss: 0.0837 - g_loss: 5.7615 - gen_acc: 0.9937 - real_acc: 0.9602
13/46 ━━━━━ [37m━━━━━━━━━━━━━━━ 5 秒 175 毫秒/步 - aug_p: 0.0054 - d_loss: 0.0825 - g_loss: 5.6750 - gen_acc: 0.9937 - real_acc: 0.9614
14/46 ━━━━━━ [37m━━━━━━━━━━━━━━ 5 秒 176 毫秒/步 - aug_p: 0.0055 - d_loss: 0.0813 - g_loss: 5.5972 - gen_acc: 0.9937 - real_acc: 0.9626
15/46 ━━━━━━ [37m━━━━━━━━━━━━━━ 5 秒 176 毫秒/步 - aug_p: 0.0055 - d_loss: 0.0802 - g_loss: 5.5273 - gen_acc: 0.9938 - real_acc: 0.9636
16/46 ━━━━━━ [37m━━━━━━━━━━━━━━ 5 秒 176 毫秒/步 - aug_p: 0.0055 - d_loss: 0.0792 - g_loss: 5.4619 - gen_acc: 0.9939 - real_acc: 0.9645
17/46 ━━━━━━━ [37m━━━━━━━━━━━━━ 5 秒 176 毫秒/步 - aug_p: 0.0056 - d_loss: 0.0783 - g_loss: 5.4012 - gen_acc: 0.9940 - real_acc: 0.9654
18/46 ━━━━━━━ [37m━━━━━━━━━━━━━ 4 秒 176 毫秒/步 - aug_p: 0.0056 - d_loss: 0.0775 - g_loss: 5.3477 - gen_acc: 0.9941 - real_acc: 0.9661
19/46 ━━━━━━━━ [37m━━━━━━━━━━━━ 4 秒 176 毫秒/步 - aug_p: 0.0056 - d_loss: 0.0768 - g_loss: 5.2979 - gen_acc: 0.9941 - real_acc: 0.9667
20/46 ━━━━━━━━ [37m━━━━━━━━━━━━ 4 秒 176 毫秒/步 - aug_p: 0.0057 - d_loss: 0.0762 - g_loss: 5.2495 - gen_acc: 0.9941 - real_acc: 0.9673
21/46 ━━━━━━━━━ [37m━━━━━━━━━━━ 4 秒 176 毫秒/步 - aug_p: 0.0057 - d_loss: 0.0758 - g_loss: 5.2113 - gen_acc: 0.9940 - real_acc: 0.9677
22/46 ━━━━━━━━━ [37m━━━━━━━━━━━ 4 秒 176 毫秒/步 - aug_p: 0.0057 - d_loss: 0.0754 - g_loss: 5.1753 - gen_acc: 0.9940 - real_acc: 0.9681
23/46 ━━━━━━━━━━ [37m━━━━━━━━━━ 4 秒 176 毫秒/步 - aug_p: 0.0058 - d_loss: 0.0752 - g_loss: 5.1387 - gen_acc: 0.9940 - real_acc: 0.9684
24/46 ━━━━━━━━━━ [37m━━━━━━━━━━ 3 秒 176 毫秒/步 - aug_p: 0.0058 - d_loss: 0.0749 - g_loss: 5.1112 - gen_acc: 0.9939 - real_acc: 0.9688
25/46 ━━━━━━━━━━ [37m━━━━━━━━━━ 3 秒 176 毫秒/步 - aug_p: 0.0058 - d_loss: 0.0746 - g_loss: 5.0899 - gen_acc: 0.9939 - real_acc: 0.9691
26/46 ━━━━━━━━━━━ [37m━━━━━━━━━ 3 秒 177 毫秒/步 - aug_p: 0.0059 - d_loss: 0.0744 - g_loss: 5.0691 - gen_acc: 0.9939 - real_acc: 0.9693
27/46 ━━━━━━━━━━━ [37m━━━━━━━━━ 3 秒 177 毫秒/步 - aug_p: 0.0059 - d_loss: 0.0743 - g_loss: 5.0465 - gen_acc: 0.9937 - real_acc: 0.9696
28/46 ━━━━━━━━━━━━ [37m━━━━━━━━ 3 秒 177 毫秒/步 - aug_p: 0.0059 - d_loss: 0.0742 - g_loss: 5.0296 - gen_acc: 0.9935 - real_acc: 0.9698
29/46 ━━━━━━━━━━━━ [37m━━━━━━━━ 3 秒 177 毫秒/步 - aug_p: 0.0060 - d_loss: 0.0741 - g_loss: 5.0163 - gen_acc: 0.9934 - real_acc: 0.9701
30/46 ━━━━━━━━━━━━━ [37m━━━━━━━ 2 秒 177 毫秒/步 - aug_p: 0.0060 - d_loss: 0.0740 - g_loss: 5.0018 - gen_acc: 0.9932 - real_acc: 0.9703
31/46 ━━━━━━━━━━━━━ [37m━━━━━━━ 2 秒 177 毫秒/步 - aug_p: 0.0060 - d_loss: 0.0739 - g_loss: 4.9862 - gen_acc: 0.9931 - real_acc: 0.9705
32/46 ━━━━━━━━━━━━━ [37m━━━━━━━ 2 秒 177 毫秒/步 - aug_p: 0.0061 - d_loss: 0.0739 - g_loss: 4.9725 - gen_acc: 0.9929 - real_acc: 0.9707
33/46 ━━━━━━━━━━━━━━ [37m━━━━━━ 2 秒 177 毫秒/步 - aug_p: 0.0061 - d_loss: 0.0739 - g_loss: 4.9583 - gen_acc: 0.9928 - real_acc: 0.9709
34/46 ━━━━━━━━━━━━━━ [37m━━━━━━ 2 秒 178 毫秒/步 - aug_p: 0.0061 - d_loss: 0.0739 - g_loss: 4.9439 - gen_acc: 0.9927 - real_acc: 0.9711
35/46 ━━━━━━━━━━━━━━━ [37m━━━━━ 1 秒 178 毫秒/步 - aug_p: 0.0062 - d_loss: 0.0739 - g_loss: 4.9297 - gen_acc: 0.9926 - real_acc: 0.9712
36/46 ━━━━━━━━━━━━━━━ [37m━━━━━ 1 秒 178 毫秒/步 - aug_p: 0.0062 - d_loss: 0.0740 - g_loss: 4.9151 - gen_acc: 0.9925 - real_acc: 0.9714
37/46 ━━━━━━━━━━━━━━━━ [37m━━━━ 1 秒 178 毫秒/步 - aug_p: 0.0062 - d_loss: 0.0741 - g_loss: 4.9027 - gen_acc: 0.9924 - real_acc: 0.9714
38/46 ━━━━━━━━━━━━━━━━ [37m━━━━ 1 秒 178 毫秒/步 - aug_p: 0.0063 - d_loss: 0.0743 - g_loss: 4.8890 - gen_acc: 0.9921 - real_acc: 0.9715
39/46 ━━━━━━━━━━━━━━━━ [37m━━━━ 1 秒 178 毫秒/步 - aug_p: 0.0063 - d_loss: 0.0748 - g_loss: 4.8802 - gen_acc: 0.9918 - real_acc: 0.9713
40/46 ━━━━━━━━━━━━━━━━━ [37m━━━ 1 秒 178 毫秒/步 - aug_p: 0.0063 - d_loss: 0.0752 - g_loss: 4.8742 - gen_acc: 0.9916 - real_acc: 0.9712
41/46 ━━━━━━━━━━━━━━━━━ [37m━━━ 0 秒 178 毫秒/步 - aug_p: 0.0064 - d_loss: 0.0756 - g_loss: 4.8685 - gen_acc: 0.9914 - real_acc: 0.9710
42/46 ━━━━━━━━━━━━━━━━━━ [37m━━ 0 秒 178 毫秒/步 - aug_p: 0.0064 - d_loss: 0.0759 - g_loss: 4.8620 - gen_acc: 0.9911 - real_acc: 0.9709
43/46 ━━━━━━━━━━━━━━━━━━ [37m━━ 0 秒 178 毫秒/步 - aug_p: 0.0064 - d_loss: 0.0762 - g_loss: 4.8555 - gen_acc: 0.9909 - real_acc: 0.9708
44/46 ━━━━━━━━━━━━━━━━━━━ [37m━ 0 秒 178 毫秒/步 - aug_p: 0.0064 - d_loss: 0.0765 - g_loss: 4.8492 - gen_acc: 0.9907 - real_acc: 0.9707
45/46 ━━━━━━━━━━━━━━━━━━━ [37m━ 0 秒 178 毫秒/步 - aug_p: 0.0065 - d_loss: 0.0768 - g_loss: 4.8424 - gen_acc: 0.9905 - real_acc: 0.9707
46/46 ━━━━━━━━━━━━━━━━━━━━ 0 秒 178 毫秒/步 - aug_p: 0.0065 - d_loss: 0.0771 - g_loss: 4.8357 - gen_acc: 0.9902 - real_acc: 0.9706
46/46 ━━━━━━━━━━━━━━━━━━━━ 43 秒 280 毫秒/步 - aug_p: 0.0065 - d_loss: 0.0774 - g_loss: 4.8293 - gen_acc: 0.9900 - real_acc: 0.9705 - val_kid: 8.8293
Epoch 3/10
1/46 [37m━━━━━━━━━━━━━━━━━━━━ 5:54 8 秒/步 - aug_p: 0.0105 - d_loss: 0.0941 - g_loss: 3.4148 - gen_acc: 0.9766 - real_acc: 0.9609
2/46 [37m━━━━━━━━━━━━━━━━━━━━ 8 秒 196 毫秒/步 - aug_p: 0.0105 - d_loss: 0.0925 - g_loss: 3.3668 - gen_acc: 0.9805 - real_acc: 0.9668
3/46 ━ [37m━━━━━━━━━━━━━━━━━━━ 8 秒 187 毫秒/步 - aug_p: 0.0106 - d_loss: 0.0918 - g_loss: 3.3820 - gen_acc: 0.9835 - real_acc: 0.9666
4/46 ━ [37m━━━━━━━━━━━━━━━━━━━ 7 秒 183 毫秒/步 - aug_p: 0.0106 - d_loss: 0.0932 - g_loss: 3.3732 - gen_acc: 0.9847 - real_acc: 0.9661
5/46 ━━ [37m━━━━━━━━━━━━━━━━━━ 7 秒 182 毫秒/步 - aug_p: 0.0106 - d_loss: 0.0941 - g_loss: 3.3531 - gen_acc: 0.9859 - real_acc: 0.9670
6/46 ━━ [37m━━━━━━━━━━━━━━━━━━ 7 秒 181 毫秒/步 - aug_p: 0.0107 - d_loss: 0.0942 - g_loss: 3.3519 - gen_acc: 0.9869 - real_acc: 0.9679
7/46 ━━━ [37m━━━━━━━━━━━━━━━━━ 7 秒 180 毫秒/步 - aug_p: 0.0107 - d_loss: 0.0941 - g_loss: 3.3467 - gen_acc: 0.9877 - real_acc: 0.9690
8/46 ━━━ [37m━━━━━━━━━━━━━━━━━ 6 秒 179 毫秒/步 - aug_p: 0.0107 - d_loss: 0.0944 - g_loss: 3.3438 - gen_acc: 0.9882 - real_acc: 0.9693
9/46 ━━━ [37m━━━━━━━━━━━━━━━━━ 6 秒 179 毫秒/步 - aug_p: 0.0107 - d_loss: 0.0947 - g_loss: 3.3384 - gen_acc: 0.9886 - real_acc: 0.9696
10/46 ━━━━ [37m━━━━━━━━━━━━━━━━ 6 秒 180 毫秒/步 - aug_p: 0.0108 - d_loss: 0.0948 - g_loss: 3.3468 - gen_acc: 0.9889 - real_acc: 0.9694
11/46 ━━━━ [37m━━━━━━━━━━━━━━━━ 6 秒 180 毫秒/步 - aug_p: 0.0108 - d_loss: 0.0952 - g_loss: 3.3443 - gen_acc: 0.9888 - real_acc: 0.9695
12/46 ━━━━━ [37m━━━━━━━━━━━━━━━ 6 秒 180 毫秒/步 - aug_p: 0.0108 - d_loss: 0.0955 - g_loss: 3.3676 - gen_acc: 0.9887 - real_acc: 0.9693
13/46 ━━━━━ [37m━━━━━━━━━━━━━━━ 5 秒 180 毫秒/步 - aug_p: 0.0109 - d_loss: 0.0954 - g_loss: 3.3959 - gen_acc: 0.9888 - real_acc: 0.9693
14/46 ━━━━━━ [37m━━━━━━━━━━━━━━ 5 秒 180 毫秒/步 - aug_p: 0.0109 - d_loss: 0.0957 - g_loss: 3.4125 - gen_acc: 0.9883 - real_acc: 0.9694
15/46 ━━━━━━ [37m━━━━━━━━━━━━━━ 5 秒 180 毫秒/步 - aug_p: 0.0109 - d_loss: 0.0963 - g_loss: 3.4419 - gen_acc: 0.9880 - real_acc: 0.9688
16/46 ━━━━━━ [37m━━━━━━━━━━━━━━ 5 秒 180 毫秒/步 - aug_p: 0.0110 - d_loss: 0.0969 - g_loss: 3.4641 - gen_acc: 0.9876 - real_acc: 0.9684
17/46 ━━━━━━━ [37m━━━━━━━━━━━━━ 5 秒 180 毫秒/步 - aug_p: 0.0110 - d_loss: 0.0972 - g_loss: 3.4867 - gen_acc: 0.9873 - real_acc: 0.9681
18/46 ━━━━━━━ [37m━━━━━━━━━━━━━ 5 秒 180 毫秒/步 - aug_p: 0.0110 - d_loss: 0.0975 - g_loss: 3.5046 - gen_acc: 0.9869 - real_acc: 0.9679
19/46 ━━━━━━━━ [37m━━━━━━━━━━━━ 4 秒 180 毫秒/步 - aug_p: 0.0110 - d_loss: 0.0977 - g_loss: 3.5235 - gen_acc: 0.9866 - real_acc: 0.9678
20/46 ━━━━━━━━ [37m━━━━━━━━━━━━ 4 秒 180 毫秒/步 - aug_p: 0.0111 - d_loss: 0.0978 - g_loss: 3.5387 - gen_acc: 0.9863 - real_acc: 0.9677
21/46 ━━━━━━━━━ [37m━━━━━━━━━━━ 4 秒 180 毫秒/步 - aug_p: 0.0111 - d_loss: 0.0980 - g_loss: 3.5544 - gen_acc: 0.9861 - real_acc: 0.9676
22/46 ━━━━━━━━━ [37m━━━━━━━━━━━ 4 秒 179 毫秒/步 - aug_p: 0.0111 - d_loss: 0.0983 - g_loss: 3.5646 - gen_acc: 0.9857 - real_acc: 0.9675
23/46 ━━━━━━━━━━ [37m━━━━━━━━━━ 4 秒 179 毫秒/步 - aug_p: 0.0112 - d_loss: 0.0990 - g_loss: 3.5834 - gen_acc: 0.9853 - real_acc: 0.9670
24/46 ━━━━━━━━━━ [37m━━━━━━━━━━ 3 秒 179 毫秒/步 - aug_p: 0.0112 - d_loss: 0.0995 - g_loss: 3.6027 - gen_acc: 0.9850 - real_acc: 0.9665
25/46 ━━━━━━━━━━ [37m━━━━━━━━━━ 3 秒 179 毫秒/步 - aug_p: 0.0112 - d_loss: 0.1001 - g_loss: 3.6171 - gen_acc: 0.9845 - real_acc: 0.9662
26/46 ━━━━━━━━━━━ [37m━━━━━━━━━ 3 秒 179 毫秒/步 - aug_p: 0.0112 - d_loss: 0.1006 - g_loss: 3.6374 - gen_acc: 0.9840 - real_acc: 0.9659
27/46 ━━━━━━━━━━━ [37m━━━━━━━━━ 3 秒 179 毫秒/步 - aug_p: 0.0113 - d_loss: 0.1009 - g_loss: 3.6630 - gen_acc: 0.9836 - real_acc: 0.9656
28/46 ━━━━━━━━━━━━ [37m━━━━━━━━ 3 秒 179 毫秒/步 - aug_p: 0.0113 - d_loss: 0.1012 - g_loss: 3.6907 - gen_acc: 0.9833 - real_acc: 0.9654
29/46 ━━━━━━━━━━━━ [37m━━━━━━━━ 3 秒 179 毫秒/步 - aug_p: 0.0113 - d_loss: 0.1014 - g_loss: 3.7165 - gen_acc: 0.9830 - real_acc: 0.9652
30/46 ━━━━━━━━━━━━━ [37m━━━━━━━ 2 秒 179 毫秒/步 - aug_p: 0.0114 - d_loss: 0.1016 - g_loss: 3.7387 - gen_acc: 0.9827 - real_acc: 0.9651
31/46 ━━━━━━━━━━━━━ [37m━━━━━━━ 2 秒 179 毫秒/步 - aug_p: 0.0114 - d_loss: 0.1016 - g_loss: 3.7601 - gen_acc: 0.9824 - real_acc: 0.9650
32/46 ━━━━━━━━━━━━━ [37m━━━━━━━ 2 秒 179 毫秒/步 - aug_p: 0.0114 - d_loss: 0.1017 - g_loss: 3.7799 - gen_acc: 0.9822 - real_acc: 0.9649
33/46 ━━━━━━━━━━━━━━ [37m━━━━━━ 2 秒 179 毫秒/步 - aug_p: 0.0114 - d_loss: 0.1017 - g_loss: 3.7963 - gen_acc: 0.9820 - real_acc: 0.9649
34/46 ━━━━━━━━━━━━━━ [37m━━━━━━ 2 秒 179 毫秒/步 - aug_p: 0.0115 - d_loss: 0.1019 - g_loss: 3.8154 - gen_acc: 0.9818 - real_acc: 0.9647
35/46 ━━━━━━━━━━━━━━━ [37m━━━━━ 1 秒 179 毫秒/步 - aug_p: 0.0115 - d_loss: 0.1020 - g_loss: 3.8348 - gen_acc: 0.9816 - real_acc: 0.9645
36/46 ━━━━━━━━━━━━━━━ [37m━━━━━ 1 秒 179 毫秒/步 - aug_p: 0.0115 - d_loss: 0.1022 - g_loss: 3.8515 - gen_acc: 0.9813 - real_acc: 0.9644
37/46 ━━━━━━━━━━━━━━━━ [37m━━━━ 1 秒 179 毫秒/步 - aug_p: 0.0115 - d_loss: 0.1025 - g_loss: 3.8702 - gen_acc: 0.9810 - real_acc: 0.9642
38/46 ━━━━━━━━━━━━━━━━ [37m━━━━ 1 秒 179 毫秒/步 - aug_p: 0.0116 - d_loss: 0.1027 - g_loss: 3.8891 - gen_acc: 0.9807 - real_acc: 0.9640
39/46 ━━━━━━━━━━━━━━━━ [37m━━━━ 1 秒 179 毫秒/步 - aug_p: 0.0116 - d_loss: 0.1032 - g_loss: 3.9048 - gen_acc: 0.9803 - real_acc: 0.9638
40/46 ━━━━━━━━━━━━━━━━━ [37m━━━ 1 秒 179 毫秒/步 - aug_p: 0.0116 - d_loss: 0.1036 - g_loss: 3.9227 - gen_acc: 0.9799 - real_acc: 0.9636
41/46 ━━━━━━━━━━━━━━━━━ [37m━━━ 0 秒 179 毫秒/步 - aug_p: 0.0117 - d_loss: 0.1040 - g_loss: 3.9415 - gen_acc: 0.9796 - real_acc: 0.9633
42/46 ━━━━━━━━━━━━━━━━━━ [37m━━ 0 秒 179 毫秒/步 - aug_p: 0.0117 - d_loss: 0.1044 - g_loss: 3.9588 - gen_acc: 0.9792 - real_acc: 0.9631
43/46 ━━━━━━━━━━━━━━━━━━ [37m━━ 0 秒 179 毫秒/步 - aug_p: 0.0117 - d_loss: 0.1048 - g_loss: 3.9748 - gen_acc: 0.9789 - real_acc: 0.9629
44/46 ━━━━━━━━━━━━━━━━━━━ [37m━ 0 秒 179 毫秒/步 - aug_p: 0.0117 - d_loss: 0.1052 - g_loss: 3.9895 - gen_acc: 0.9785 - real_acc: 0.9627
45/46 ━━━━━━━━━━━━━━━━━━━ [37m━ 0 秒 179 毫秒/步 - aug_p: 0.0118 - d_loss: 0.1055 - g_loss: 4.0041 - gen_acc: 0.9782 - real_acc: 0.9626
46/46 ━━━━━━━━━━━━━━━━━━━━ 0 秒 179 毫秒/步 - aug_p: 0.0118 - d_loss: 0.1058 - g_loss: 4.0177 - gen_acc: 0.9779 - real_acc: 0.9624
46/46 ━━━━━━━━━━━━━━━━━━━━ 22 秒 315 毫秒/步 - aug_p: 0.0118 - d_loss: 0.1061 - g_loss: 4.0306 - gen_acc: 0.9776 - real_acc: 0.9623 - val_kid: 8.4585
Epoch 4/10
1/46 [37m━━━━━━━━━━━━━━━━━━━━ 11 秒 263 毫秒/步 - aug_p: 0.0154 - d_loss: 0.1223 - g_loss: 2.5203 - gen_acc: 0.9688 - real_acc: 1.0000
2/46 [37m━━━━━━━━━━━━━━━━━━━━ 7 秒 180 毫秒/步 - aug_p: 0.0154 - d_loss: 0.1018 - g_loss: 3.6445 - gen_acc: 0.9766 - real_acc: 0.9980
3/46 ━ [37m━━━━━━━━━━━━━━━━━━━ 7 秒 180 毫秒/步 - aug_p: 0.0155 - d_loss: 0.0925 - g_loss: 4.2071 - gen_acc: 0.9809 - real_acc: 0.9926
4/46 ━ [37m━━━━━━━━━━━━━━━━━━━ 7 秒 180 毫秒/步 - aug_p: 0.0155 - d_loss: 0.0875 - g_loss: 4.3535 - gen_acc: 0.9827 - real_acc: 0.9910
5/46 ━━ [37m━━━━━━━━━━━━━━━━━━ 7 秒 180 毫秒/步 - aug_p: 0.0155 - d_loss: 0.0850 - g_loss: 4.3580 - gen_acc: 0.9843 - real_acc: 0.9900
6/46 ━━ [37m━━━━━━━━━━━━━━━━━━ 7 秒 180 毫秒/步 - aug_p: 0.0156 - d_loss: 0.0830 - g_loss: 4.3789 - gen_acc: 0.9856 - real_acc: 0.9889
7/46 ━━━ [37m━━━━━━━━━━━━━━━━━ 7 秒 180 毫秒/步 - aug_p: 0.0156 - d_loss: 0.0821 - g_loss: 4.3592 - gen_acc: 0.9864 - real_acc: 0.9879
8/46 ━━━ [37m━━━━━━━━━━━━━━━━━ 6 秒 180 毫秒/步 - aug_p: 0.0156 - d_loss: 0.0814 - g_loss: 4.3377 - gen_acc: 0.9871 - real_acc: 0.9870
9/46 ━━━ [37m━━━━━━━━━━━━━━━━━ 6 秒 180 毫秒/步 - aug_p: 0.0156 - d_loss: 0.0811 - g_loss: 4.3049 - gen_acc: 0.9876 - real_acc: 0.9864
10/46 ━━━━ [37m━━━━━━━━━━━━━━━━ 6 秒 180 毫秒/步 - aug_p: 0.0157 - d_loss: 0.0807 - g_loss: 4.2813 - gen_acc: 0.9881 - real_acc: 0.9859
11/46 ━━━━ [37m━━━━━━━━━━━━━━━━ 6 秒 180 毫秒/步 - aug_p: 0.0157 - d_loss: 0.0804 - g_loss: 4.2560 - gen_acc: 0.9884 - real_acc: 0.9855
12/46 ━━━━━ [37m━━━━━━━━━━━━━━━ 6 秒 180 毫秒/步 - aug_p: 0.0157 - d_loss: 0.0804 - g_loss: 4.2284 - gen_acc: 0.9886 - real_acc: 0.9851
13/46 ━━━━━ [37m━━━━━━━━━━━━━━━ 5 秒 180 毫秒/步 - aug_p: 0.0158 - d_loss: 0.0806 - g_loss: 4.2117 - gen_acc: 0.9888 - real_acc: 0.9847
14/46 ━━━━━━ [37m━━━━━━━━━━━━━━ 5 秒 180 毫秒/步 - aug_p: 0.0158 - d_loss: 0.0807 - g_loss: 4.1925 - gen_acc: 0.9887 - real_acc: 0.9844
15/46 ━━━━━━ [37m━━━━━━━━━━━━━━ 5 秒 180 毫秒/步 - aug_p: 0.0158 - d_loss: 0.0807 - g_loss: 4.1790 - gen_acc: 0.9888 - real_acc: 0.9841
16/46 ━━━━━━ [37m━━━━━━━━━━━━━━ 5 秒 180 毫秒/步 - aug_p: 0.0159 - d_loss: 0.0807 - g_loss: 4.1631 - gen_acc: 0.9887 - real_acc: 0.9840
17/46 ━━━━━━━ [37m━━━━━━━━━━━━━ 5 秒 180 毫秒/步 - aug_p: 0.0159 - d_loss: 0.0807 - g_loss: 4.1518 - gen_acc: 0.9887 - real_acc: 0.9838
18/46 ━━━━━━━ [37m━━━━━━━━━━━━━ 5秒 180毫秒/步驟 - aug_p: 0.0159 - d_loss: 0.0807 - g_loss: 4.1398 - gen_acc: 0.9887 - real_acc: 0.9837
19/46 ━━━━━━━━ [37m━━━━━━━━━━━━ 4秒 180毫秒/步驟 - aug_p: 0.0160 - d_loss: 0.0809 - g_loss: 4.1255 - gen_acc: 0.9887 - real_acc: 0.9837
20/46 ━━━━━━━━ [37m━━━━━━━━━━━━ 4秒 180毫秒/步驟 - aug_p: 0.0160 - d_loss: 0.0810 - g_loss: 4.1171 - gen_acc: 0.9887 - real_acc: 0.9835
21/46 ━━━━━━━━━ [37m━━━━━━━━━━━ 4秒 180毫秒/步驟 - aug_p: 0.0160 - d_loss: 0.0810 - g_loss: 4.1116 - gen_acc: 0.9886 - real_acc: 0.9835
22/46 ━━━━━━━━━ [37m━━━━━━━━━━━ 4秒 180毫秒/步驟 - aug_p: 0.0161 - d_loss: 0.0811 - g_loss: 4.1037 - gen_acc: 0.9885 - real_acc: 0.9834
23/46 ━━━━━━━━━━ [37m━━━━━━━━━━ 4秒 180毫秒/步驟 - aug_p: 0.0161 - d_loss: 0.0812 - g_loss: 4.1013 - gen_acc: 0.9885 - real_acc: 0.9833
24/46 ━━━━━━━━━━ [37m━━━━━━━━━━ 3秒 180毫秒/步驟 - aug_p: 0.0161 - d_loss: 0.0813 - g_loss: 4.1000 - gen_acc: 0.9884 - real_acc: 0.9832
25/46 ━━━━━━━━━━ [37m━━━━━━━━━━ 3秒 180毫秒/步驟 - aug_p: 0.0162 - d_loss: 0.0814 - g_loss: 4.0967 - gen_acc: 0.9883 - real_acc: 0.9832
26/46 ━━━━━━━━━━━ [37m━━━━━━━━━ 3秒 180毫秒/步驟 - aug_p: 0.0162 - d_loss: 0.0815 - g_loss: 4.0951 - gen_acc: 0.9882 - real_acc: 0.9831
27/46 ━━━━━━━━━━━ [37m━━━━━━━━━ 3秒 180毫秒/步驟 - aug_p: 0.0162 - d_loss: 0.0815 - g_loss: 4.0930 - gen_acc: 0.9882 - real_acc: 0.9830
28/46 ━━━━━━━━━━━━ [37m━━━━━━━━ 3秒 180毫秒/步驟 - aug_p: 0.0163 - d_loss: 0.0817 - g_loss: 4.0887 - gen_acc: 0.9880 - real_acc: 0.9830
29/46 ━━━━━━━━━━━━ [37m━━━━━━━━ 3秒 180毫秒/步驟 - aug_p: 0.0163 - d_loss: 0.0818 - g_loss: 4.0890 - gen_acc: 0.9879 - real_acc: 0.9829
30/46 ━━━━━━━━━━━━━ [37m━━━━━━━ 2秒 181毫秒/步驟 - aug_p: 0.0163 - d_loss: 0.0819 - g_loss: 4.0918 - gen_acc: 0.9878 - real_acc: 0.9828
31/46 ━━━━━━━━━━━━━ [37m━━━━━━━ 2秒 181毫秒/步驟 - aug_p: 0.0164 - d_loss: 0.0821 - g_loss: 4.0923 - gen_acc: 0.9877 - real_acc: 0.9826
32/46 ━━━━━━━━━━━━━ [37m━━━━━━━ 2秒 181毫秒/步驟 - aug_p: 0.0164 - d_loss: 0.0823 - g_loss: 4.0957 - gen_acc: 0.9876 - real_acc: 0.9826
33/46 ━━━━━━━━━━━━━━ [37m━━━━━━ 2秒 181毫秒/步驟 - aug_p: 0.0164 - d_loss: 0.0824 - g_loss: 4.1014 - gen_acc: 0.9874 - real_acc: 0.9825
34/46 ━━━━━━━━━━━━━━ [37m━━━━━━ 2秒 181毫秒/步驟 - aug_p: 0.0165 - d_loss: 0.0824 - g_loss: 4.1072 - gen_acc: 0.9873 - real_acc: 0.9824
35/46 ━━━━━━━━━━━━━━━ [37m━━━━━ 1秒 180毫秒/步驟 - aug_p: 0.0165 - d_loss: 0.0825 - g_loss: 4.1116 - gen_acc: 0.9872 - real_acc: 0.9823
36/46 ━━━━━━━━━━━━━━━ [37m━━━━━ 1秒 180毫秒/步驟 - aug_p: 0.0165 - d_loss: 0.0826 - g_loss: 4.1168 - gen_acc: 0.9871 - real_acc: 0.9822
37/46 ━━━━━━━━━━━━━━━━ [37m━━━━ 1秒 181毫秒/步驟 - aug_p: 0.0166 - d_loss: 0.0827 - g_loss: 4.1217 - gen_acc: 0.9870 - real_acc: 0.9822
38/46 ━━━━━━━━━━━━━━━━ [37m━━━━ 1秒 180毫秒/步驟 - aug_p: 0.0166 - d_loss: 0.0827 - g_loss: 4.1262 - gen_acc: 0.9869 - real_acc: 0.9821
39/46 ━━━━━━━━━━━━━━━━ [37m━━━━ 1秒 180毫秒/步驟 - aug_p: 0.0166 - d_loss: 0.0828 - g_loss: 4.1298 - gen_acc: 0.9868 - real_acc: 0.9820
40/46 ━━━━━━━━━━━━━━━━━ [37m━━━ 1秒 180毫秒/步驟 - aug_p: 0.0167 - d_loss: 0.0828 - g_loss: 4.1333 - gen_acc: 0.9868 - real_acc: 0.9820
41/46 ━━━━━━━━━━━━━━━━━ [37m━━━ 0秒 181毫秒/步驟 - aug_p: 0.0167 - d_loss: 0.0828 - g_loss: 4.1361 - gen_acc: 0.9867 - real_acc: 0.9819
42/46 ━━━━━━━━━━━━━━━━━━ [37m━━ 0秒 181毫秒/步驟 - aug_p: 0.0167 - d_loss: 0.0828 - g_loss: 4.1389 - gen_acc: 0.9866 - real_acc: 0.9819
43/46 ━━━━━━━━━━━━━━━━━━ [37m━━ 0秒 181毫秒/步驟 - aug_p: 0.0168 - d_loss: 0.0828 - g_loss: 4.1408 - gen_acc: 0.9866 - real_acc: 0.9819
44/46 ━━━━━━━━━━━━━━━━━━━ [37m━ 0秒 181毫秒/步驟 - aug_p: 0.0168 - d_loss: 0.0828 - g_loss: 4.1438 - gen_acc: 0.9865 - real_acc: 0.9818
45/46 ━━━━━━━━━━━━━━━━━━━ [37m━ 0秒 181毫秒/步驟 - aug_p: 0.0168 - d_loss: 0.0828 - g_loss: 4.1466 - gen_acc: 0.9865 - real_acc: 0.9818
46/46 ━━━━━━━━━━━━━━━━━━━━ 0秒 181毫秒/步驟 - aug_p: 0.0168 - d_loss: 0.0829 - g_loss: 4.1480 - gen_acc: 0.9864 - real_acc: 0.9818
46/46 ━━━━━━━━━━━━━━━━━━━━ 14秒 316毫秒/步驟 - aug_p: 0.0169 - d_loss: 0.0829 - g_loss: 4.1493 - gen_acc: 0.9863 - real_acc: 0.9817 - val_kid: 6.6764
Epoch 5/10
1/46 [37m━━━━━━━━━━━━━━━━━━━━ 10秒 237毫秒/步驟 - aug_p: 0.0212 - d_loss: 0.3046 - g_loss: 11.2403 - gen_acc: 1.0000 - real_acc: 0.7734
2/46 [37m━━━━━━━━━━━━━━━━━━━━ 8秒 197毫秒/步驟 - aug_p: 0.0212 - d_loss: 0.2549 - g_loss: 10.8464 - gen_acc: 1.0000 - real_acc: 0.8086
3/46 ━ [37m━━━━━━━━━━━━━━━━━━━ 8秒 190毫秒/步驟 - aug_p: 0.0212 - d_loss: 0.2217 - g_loss: 10.0394 - gen_acc: 0.9983 - real_acc: 0.8359
4/46 ━ [37m━━━━━━━━━━━━━━━━━━━ 7秒 187毫秒/步驟 - aug_p: 0.0212 - d_loss: 0.2183 - g_loss: 9.2019 - gen_acc: 0.9753 - real_acc: 0.8560
5/46 ━━ [37m━━━━━━━━━━━━━━━━━━ 7秒 185毫秒/步驟 - aug_p: 0.0212 - d_loss: 0.2125 - g_loss: 8.8056 - gen_acc: 0.9652 - real_acc: 0.8676
6/46 ━━ [37m━━━━━━━━━━━━━━━━━━ 7秒 185毫秒/步驟 - aug_p: 0.0213 - d_loss: 0.2060 - g_loss: 8.5755 - gen_acc: 0.9606 - real_acc: 0.8755
7/46 ━━━ [37m━━━━━━━━━━━━━━━━━ 7秒 184毫秒/步驟 - aug_p: 0.0213 - d_loss: 0.1995 - g_loss: 8.3695 - gen_acc: 0.9579 - real_acc: 0.8823
8/46 ━━━ [37m━━━━━━━━━━━━━━━━━ 7秒 184毫秒/步驟 - aug_p: 0.0213 - d_loss: 0.1938 - g_loss: 8.1574 - gen_acc: 0.9561 - real_acc: 0.8884
9/46 ━━━ [37m━━━━━━━━━━━━━━━━━ 6秒 184毫秒/步驟 - aug_p: 0.0214 - d_loss: 0.1881 - g_loss: 7.9590 - gen_acc: 0.9552 - real_acc: 0.8939
10/46 ━━━━ [37m━━━━━━━━━━━━━━━━ 6秒 184毫秒/步驟 - aug_p: 0.0214 - d_loss: 0.1827 - g_loss: 7.7719 - gen_acc: 0.9550 - real_acc: 0.8989
11/46 ━━━━ [37m━━━━━━━━━━━━━━━━ 6秒 183毫秒/步驟 - aug_p: 0.0214 - d_loss: 0.1785 - g_loss: 7.5867 - gen_acc: 0.9546 - real_acc: 0.9034
12/46 ━━━━━ [37m━━━━━━━━━━━━━━━ 6秒 183毫秒/步驟 - aug_p: 0.0214 - d_loss: 0.1748 - g_loss: 7.4330 - gen_acc: 0.9546 - real_acc: 0.9072
13/46 ━━━━━ [37m━━━━━━━━━━━━━━━ 6秒 183毫秒/步驟 - aug_p: 0.0215 - d_loss: 0.1717 - g_loss: 7.2895 - gen_acc: 0.9548 - real_acc: 0.9103
14/46 ━━━━━━ [37m━━━━━━━━━━━━━━ 5秒 183毫秒/步驟 - aug_p: 0.0215 - d_loss: 0.1693 - g_loss: 7.1489 - gen_acc: 0.9544 - real_acc: 0.9132
15/46 ━━━━━━ [37m━━━━━━━━━━━━━━ 5秒 182毫秒/步驟 - aug_p: 0.0215 - d_loss: 0.1674 - g_loss: 7.0344 - gen_acc: 0.9543 - real_acc: 0.9153
16/46 ━━━━━━ [37m━━━━━━━━━━━━━━ 5秒 182毫秒/步驟 - aug_p: 0.0215 - d_loss: 0.1654 - g_loss: 6.9321 - gen_acc: 0.9544 - real_acc: 0.9173
17/46 ━━━━━━━ [37m━━━━━━━━━━━━━ 5秒 182毫秒/步驟 - aug_p: 0.0216 - d_loss: 0.1637 - g_loss: 6.8304 - gen_acc: 0.9541 - real_acc: 0.9191
18/46 ━━━━━━━ [37m━━━━━━━━━━━━━ 5秒 183毫秒/步驟 - aug_p: 0.0216 - d_loss: 0.1620 - g_loss: 6.7449 - gen_acc: 0.9540 - real_acc: 0.9209
19/46 ━━━━━━━━ [37m━━━━━━━━━━━━ 4秒 183毫秒/步驟 - aug_p: 0.0216 - d_loss: 0.1603 - g_loss: 6.6702 - gen_acc: 0.9540 - real_acc: 0.9225
20/46 ━━━━━━━━ [37m━━━━━━━━━━━━ 4秒 182毫秒/步驟 - aug_p: 0.0217 - d_loss: 0.1587 - g_loss: 6.5977 - gen_acc: 0.9541 - real_acc: 0.9240
21/46 ━━━━━━━━━ [37m━━━━━━━━━━━ 4秒 182毫秒/步驟 - aug_p: 0.0217 - d_loss: 0.1572 - g_loss: 6.5271 - gen_acc: 0.9542 - real_acc: 0.9255
22/46 ━━━━━━━━━ [37m━━━━━━━━━━━ 4秒 182毫秒/步驟 - aug_p: 0.0217 - d_loss: 0.1556 - g_loss: 6.4626 - gen_acc: 0.9544 - real_acc: 0.9269
23/46 ━━━━━━━━━━ [37m━━━━━━━━━━ 4秒 182毫秒/步驟 - aug_p: 0.0217 - d_loss: 0.1540 - g_loss: 6.4028 - gen_acc: 0.9546 - real_acc: 0.9282
24/46 ━━━━━━━━━━ [37m━━━━━━━━━━ 4秒 182毫秒/步驟 - aug_p: 0.0218 - d_loss: 0.1525 - g_loss: 6.3440 - gen_acc: 0.9548 - real_acc: 0.9295
25/46 ━━━━━━━━━━ [37m━━━━━━━━━━ 3秒 183毫秒/步驟 - aug_p: 0.0218 - d_loss: 0.1510 - g_loss: 6.2898 - gen_acc: 0.9551 - real_acc: 0.9307
26/46 ━━━━━━━━━━━ [37m━━━━━━━━━ 3秒 183毫秒/步驟 - aug_p: 0.0218 - d_loss: 0.1495 - g_loss: 6.2380 - gen_acc: 0.9554 - real_acc: 0.9318
27/46 ━━━━━━━━━━━ [37m━━━━━━━━━ 3秒 183毫秒/步驟 - aug_p: 0.0219 - d_loss: 0.1481 - g_loss: 6.1880 - gen_acc: 0.9558 - real_acc: 0.9330
28/46 ━━━━━━━━━━━━ [37m━━━━━━━━ 3秒 182毫秒/步驟 - aug_p: 0.0219 - d_loss: 0.1468 - g_loss: 6.1413 - gen_acc: 0.9561 - real_acc: 0.9340
29/46 ━━━━━━━━━━━━ [37m━━━━━━━━ 3秒 183毫秒/步驟 - aug_p: 0.0219 - d_loss: 0.1454 - g_loss: 6.0966 - gen_acc: 0.9565 - real_acc: 0.9350
30/46 ━━━━━━━━━━━━━ [37m━━━━━━━ 2秒 182毫秒/步驟 - aug_p: 0.0220 - d_loss: 0.1441 - g_loss: 6.0534 - gen_acc: 0.9569 - real_acc: 0.9360
31/46 ━━━━━━━━━━━━━ [37m━━━━━━━ 2秒 183毫秒/步驟 - aug_p: 0.0220 - d_loss: 0.1428 - g_loss: 6.0122 - gen_acc: 0.9573 - real_acc: 0.9370
32/46 ━━━━━━━━━━━━━ [37m━━━━━━━ 2秒 182毫秒/步驟 - aug_p: 0.0220 - d_loss: 0.1415 - g_loss: 5.9738 - gen_acc: 0.9577 - real_acc: 0.9379
33/46 ━━━━━━━━━━━━━━ [37m━━━━━━ 2秒 182毫秒/步驟 - aug_p: 0.0220 - d_loss: 0.1403 - g_loss: 5.9369 - gen_acc: 0.9581 - real_acc: 0.9388
34/46 ━━━━━━━━━━━━━━ [37m━━━━━━ 2秒 182毫秒/步驟 - aug_p: 0.0221 - d_loss: 0.1390 - g_loss: 5.9020 - gen_acc: 0.9585 - real_acc: 0.9396
35/46 ━━━━━━━━━━━━━━━ [37m━━━━━ 2秒 182毫秒/步驟 - aug_p: 0.0221 - d_loss: 0.1378 - g_loss: 5.8680 - gen_acc: 0.9589 - real_acc: 0.9404
36/46 ━━━━━━━━━━━━━━━ [37m━━━━━ 1秒 182毫秒/步驟 - aug_p: 0.0221 - d_loss: 0.1366 - g_loss: 5.8355 - gen_acc: 0.9592 - real_acc: 0.9412
37/46 ━━━━━━━━━━━━━━━━ [37m━━━━ 1秒 182毫秒/步驟 - aug_p: 0.0222 - d_loss: 0.1355 - g_loss: 5.8042 - gen_acc: 0.9596 - real_acc: 0.9420
38/46 ━━━━━━━━━━━━━━━━ [37m━━━━ 1秒 182毫秒/步驟 - aug_p: 0.0222 - d_loss: 0.1344 - g_loss: 5.7737 - gen_acc: 0.9600 - real_acc: 0.9427
39/46 ━━━━━━━━━━━━━━━━ [37m━━━━ 1秒 182毫秒/步驟 - aug_p: 0.0222 - d_loss: 0.1333 - g_loss: 5.7447 - gen_acc: 0.9604 - real_acc: 0.9434
40/46 ━━━━━━━━━━━━━━━━━ [37m━━━ 1秒 182毫秒/步驟 - aug_p: 0.0223 - d_loss: 0.1323 - g_loss: 5.7161 - gen_acc: 0.9608 - real_acc: 0.9441
41/46 ━━━━━━━━━━━━━━━━━ [37m━━━ 0秒 182毫秒/步驟 - aug_p: 0.0223 - d_loss: 0.1313 - g_loss: 5.6892 - gen_acc: 0.9611 - real_acc: 0.9447
42/46 ━━━━━━━━━━━━━━━━━━ [37m━━ 0秒 182毫秒/步驟 - aug_p: 0.0223 - d_loss: 0.1304 - g_loss: 5.6621 - gen_acc: 0.9615 - real_acc: 0.9453
43/46 ━━━━━━━━━━━━━━━━━━ [37m━━ 0秒 182毫秒/步驟 - aug_p: 0.0223 - d_loss: 0.1296 - g_loss: 5.6390 - gen_acc: 0.9618 - real_acc: 0.9458
44/46 ━━━━━━━━━━━━━━━━━━━ [37m━ 0秒 182毫秒/步驟 - aug_p: 0.0224 - d_loss: 0.1288 - g_loss: 5.6185 - gen_acc: 0.9621 - real_acc: 0.9463
45/46 ━━━━━━━━━━━━━━━━━━━ [37m━ 0秒 182毫秒/步驟 - aug_p: 0.0224 - d_loss: 0.1280 - g_loss: 5.5982 - gen_acc: 0.9623 - real_acc: 0.9468
46/46 ━━━━━━━━━━━━━━━━━━━━ 0秒 182毫秒/步驟 - aug_p: 0.0224 - d_loss: 0.1273 - g_loss: 5.5795 - gen_acc: 0.9626 - real_acc: 0.9473

46/46 ━━━━━━━━━━━━━━━━━━━━ 14秒 317毫秒/步驟 - aug_p: 0.0225 - d_loss: 0.1265 - g_loss: 5.5616 - gen_acc: 0.9629 - real_acc: 0.9478 - val_kid: 4.7496
Epoch 6/10
1/46 [37m━━━━━━━━━━━━━━━━━━━━ 10秒 236毫秒/步驟 - aug_p: 0.0268 - d_loss: 0.0745 - g_loss: 5.1780 - gen_acc: 0.9922 - real_acc: 0.9688
2/46 [37m━━━━━━━━━━━━━━━━━━━━ 8秒 184毫秒/步驟 - aug_p: 0.0269 - d_loss: 0.0774 - g_loss: 4.5412 - gen_acc: 0.9883 - real_acc: 0.9766
3/46 ━ [37m━━━━━━━━━━━━━━━━━━━ 7秒 183毫秒/步驟 - aug_p: 0.0269 - d_loss: 0.0743 - g_loss: 4.5406 - gen_acc: 0.9887 - real_acc: 0.9783
4/46 ━ [37m━━━━━━━━━━━━━━━━━━━ 7秒 184毫秒/步驟 - aug_p: 0.0269 - d_loss: 0.0724 - g_loss: 4.5764 - gen_acc: 0.9896 - real_acc: 0.9779
5/46 ━━ [37m━━━━━━━━━━━━━━━━━━ 7秒 183毫秒/步驟 - aug_p: 0.0270 - d_loss: 0.0732 - g_loss: 4.5209 - gen_acc: 0.9882 - real_acc: 0.9785
6/46 ━━ [37m━━━━━━━━━━━━━━━━━━ 7秒 182毫秒/步驟 - aug_p: 0.0270 - d_loss: 0.0738 - g_loss: 4.5449 - gen_acc: 0.9878 - real_acc: 0.9782
7/46 ━━━ [37m━━━━━━━━━━━━━━━━━ 7秒 182毫秒/步驟 - aug_p: 0.0270 - d_loss: 0.0747 - g_loss: 4.5880 - gen_acc: 0.9878 - real_acc: 0.9769
8/46 ━━━ [37m━━━━━━━━━━━━━━━━━ 6秒 182毫秒/步驟 - aug_p: 0.0271 - d_loss: 0.0766 - g_loss: 4.5791 - gen_acc: 0.9857 - real_acc: 0.9763
9/46 ━━━ [37m━━━━━━━━━━━━━━━━━ 6秒 183毫秒/步驟 - aug_p: 0.0271 - d_loss: 0.0777 - g_loss: 4.6269 - gen_acc: 0.9844 - real_acc: 0.9757
10/46 ━━━━ [37m━━━━━━━━━━━━━━━━ 6秒 182毫秒/步驟 - aug_p: 0.0271 - d_loss: 0.0786 - g_loss: 4.7075 - gen_acc: 0.9836 - real_acc: 0.9749
11/46 ━━━━ [37m━━━━━━━━━━━━━━━━ 6秒 182毫秒/步驟 - aug_p: 0.0271 - d_loss: 0.0792 - g_loss: 4.7786 - gen_acc: 0.9826 - real_acc: 0.9745
12/46 ━━━━━ [37m━━━━━━━━━━━━━━━ 6秒 182毫秒/步驟 - aug_p: 0.0272 - d_loss: 0.0793 - g_loss: 4.8440 - gen_acc: 0.9820 - real_acc: 0.9744
13/46 ━━━━━ [37m━━━━━━━━━━━━━━━ 6秒 183毫秒/步驟 - aug_p: 0.0272 - d_loss: 0.0792 - g_loss: 4.9001 - gen_acc: 0.9816 - real_acc: 0.9744
14/46 ━━━━━━ [37m━━━━━━━━━━━━━━ 5秒 182毫秒/步驟 - aug_p: 0.0272 - d_loss: 0.0789 - g_loss: 4.9354 - gen_acc: 0.9814 - real_acc: 0.9745
15/46 ━━━━━━ [37m━━━━━━━━━━━━━━ 5秒 182毫秒/步驟 - aug_p: 0.0273 - d_loss: 0.0785 - g_loss: 4.9643 - gen_acc: 0.9813 - real_acc: 0.9747
16/46 ━━━━━━ [37m━━━━━━━━━━━━━━ 5秒 182毫秒/步驟 - aug_p: 0.0273 - d_loss: 0.0781 - g_loss: 4.9864 - gen_acc: 0.9814 - real_acc: 0.9749
17/46 ━━━━━━━ [37m━━━━━━━━━━━━━ 5秒 182毫秒/步驟 - aug_p: 0.0273 - d_loss: 0.0778 - g_loss: 4.9973 - gen_acc: 0.9814 - real_acc: 0.9751
18/46 ━━━━━━━ [37m━━━━━━━━━━━━━ 5秒 182毫秒/步驟 - aug_p: 0.0274 - d_loss: 0.0774 - g_loss: 5.0125 - gen_acc: 0.9815 - real_acc: 0.9753
19/46 ━━━━━━━━ [37m━━━━━━━━━━━━ 4秒 182毫秒/步驟 - aug_p: 0.0274 - d_loss: 0.0770 - g_loss: 5.0280 - gen_acc: 0.9816 - real_acc: 0.9755
20/46 ━━━━━━━━ [37m━━━━━━━━━━━━ 4秒 182毫秒/步驟 - aug_p: 0.0274 - d_loss: 0.0765 - g_loss: 5.0398 - gen_acc: 0.9818 - real_acc: 0.9757
21/46 ━━━━━━━━━ [37m━━━━━━━━━━━ 4秒 182毫秒/步驟 - aug_p: 0.0275 - d_loss: 0.0760 - g_loss: 5.0455 - gen_acc: 0.9819 - real_acc: 0.9759
22/46 ━━━━━━━━━ [37m━━━━━━━━━━━ 4秒 182毫秒/步驟 - aug_p: 0.0275 - d_loss: 0.0756 - g_loss: 5.0535 - gen_acc: 0.9820 - real_acc: 0.9760
23/46 ━━━━━━━━━━ [37m━━━━━━━━━━ 4秒 181毫秒/步驟 - aug_p: 0.0275 - d_loss: 0.0752 - g_loss: 5.0590 - gen_acc: 0.9822 - real_acc: 0.9762
24/46 ━━━━━━━━━━ [37m━━━━━━━━━━ 3秒 181毫秒/步驟 - aug_p: 0.0276 - d_loss: 0.0749 - g_loss: 5.0595 - gen_acc: 0.9823 - real_acc: 0.9763
25/46 ━━━━━━━━━━ [37m━━━━━━━━━━ 3秒 181毫秒/步驟 - aug_p: 0.0276 - d_loss: 0.0746 - g_loss: 5.0650 - gen_acc: 0.9825 - real_acc: 0.9764
26/46 ━━━━━━━━━━━ [37m━━━━━━━━━ 3秒 181毫秒/步驟 - aug_p: 0.0276 - d_loss: 0.0743 - g_loss: 5.0742 - gen_acc: 0.9826 - real_acc: 0.9765
27/46 ━━━━━━━━━━━ [37m━━━━━━━━━ 3秒 181毫秒/步驟 - aug_p: 0.0277 - d_loss: 0.0740 - g_loss: 5.0823 - gen_acc: 0.9828 - real_acc: 0.9766
28/46 ━━━━━━━━━━━━ [37m━━━━━━━━ 3秒 181毫秒/步驟 - aug_p: 0.0277 - d_loss: 0.0737 - g_loss: 5.0871 - gen_acc: 0.9829 - real_acc: 0.9767
29/46 ━━━━━━━━━━━━ [37m━━━━━━━━ 3秒 181毫秒/步驟 - aug_p: 0.0277 - d_loss: 0.0734 - g_loss: 5.0913 - gen_acc: 0.9831 - real_acc: 0.9768
30/46 ━━━━━━━━━━━━━ [37m━━━━━━━ 2秒 181毫秒/步驟 - aug_p: 0.0278 - d_loss: 0.0731 - g_loss: 5.0957 - gen_acc: 0.9832 - real_acc: 0.9769
31/46 ━━━━━━━━━━━━━ [37m━━━━━━━ 2秒 181毫秒/步驟 - aug_p: 0.0278 - d_loss: 0.0727 - g_loss: 5.0986 - gen_acc: 0.9834 - real_acc: 0.9770
32/46 ━━━━━━━━━━━━━ [37m━━━━━━━ 2秒 181毫秒/步驟 - aug_p: 0.0278 - d_loss: 0.0725 - g_loss: 5.0992 - gen_acc: 0.9835 - real_acc: 0.9771
33/46 ━━━━━━━━━━━━━━ [37m━━━━━━ 2秒 181毫秒/步驟 - aug_p: 0.0278 - d_loss: 0.0722 - g_loss: 5.1012 - gen_acc: 0.9836 - real_acc: 0.9772
34/46 ━━━━━━━━━━━━━━ [37m━━━━━━ 2秒 181毫秒/步驟 - aug_p: 0.0279 - d_loss: 0.0719 - g_loss: 5.1022 - gen_acc: 0.9838 - real_acc: 0.9773
35/46 ━━━━━━━━━━━━━━━ [37m━━━━━ 1秒 181毫秒/步驟 - aug_p: 0.0279 - d_loss: 0.0718 - g_loss: 5.1007 - gen_acc: 0.9838 - real_acc: 0.9773
36/46 ━━━━━━━━━━━━━━━ [37m━━━━━ 1秒 181毫秒/步驟 - aug_p: 0.0279 - d_loss: 0.0717 - g_loss: 5.1026 - gen_acc: 0.9839 - real_acc: 0.9773
37/46 ━━━━━━━━━━━━━━━━ [37m━━━━ 1秒 181毫秒/步驟 - aug_p: 0.0280 - d_loss: 0.0716 - g_loss: 5.1070 - gen_acc: 0.9840 - real_acc: 0.9772
38/46 ━━━━━━━━━━━━━━━━ [37m━━━━ 1秒 181毫秒/步驟 - aug_p: 0.0280 - d_loss: 0.0715 - g_loss: 5.1124 - gen_acc: 0.9840 - real_acc: 0.9772
39/46 ━━━━━━━━━━━━━━━━ [37m━━━━ 1秒 181毫秒/步驟 - aug_p: 0.0280 - d_loss: 0.0714 - g_loss: 5.1178 - gen_acc: 0.9841 - real_acc: 0.9773
40/46 ━━━━━━━━━━━━━━━━━ [37m━━━ 1秒 181毫秒/步驟 - aug_p: 0.0281 - d_loss: 0.0712 - g_loss: 5.1221 - gen_acc: 0.9842 - real_acc: 0.9773
41/46 ━━━━━━━━━━━━━━━━━ [37m━━━ 0秒 181毫秒/步驟 - aug_p: 0.0281 - d_loss: 0.0710 - g_loss: 5.1258 - gen_acc: 0.9843 - real_acc: 0.9773
42/46 ━━━━━━━━━━━━━━━━━━ [37m━━ 0秒 181毫秒/步驟 - aug_p: 0.0281 - d_loss: 0.0708 - g_loss: 5.1290 - gen_acc: 0.9843 - real_acc: 0.9773
43/46 ━━━━━━━━━━━━━━━━━━ [37m━━ 0秒 181毫秒/步驟 - aug_p: 0.0282 - d_loss: 0.0707 - g_loss: 5.1315 - gen_acc: 0.9844 - real_acc: 0.9774
44/46 ━━━━━━━━━━━━━━━━━━━ [37m━ 0秒 181毫秒/步驟 - aug_p: 0.0282 - d_loss: 0.0705 - g_loss: 5.1332 - gen_acc: 0.9845 - real_acc: 0.9774
45/46 ━━━━━━━━━━━━━━━━━━━ [37m━ 0秒 181毫秒/步驟 - aug_p: 0.0282 - d_loss: 0.0703 - g_loss: 5.1347 - gen_acc: 0.9845 - real_acc: 0.9775
46/46 ━━━━━━━━━━━━━━━━━━━━ 0秒 181毫秒/步驟 - aug_p: 0.0283 - d_loss: 0.0701 - g_loss: 5.1357 - gen_acc: 0.9846 - real_acc: 0.9775
46/46 ━━━━━━━━━━━━━━━━━━━━ 12秒 267毫秒/步驟 - aug_p: 0.0283 - d_loss: 0.0699 - g_loss: 5.1367 - gen_acc: 0.9846 - real_acc: 0.9776 - val_kid: 6.2893
Epoch 7/10
1/46 [37m━━━━━━━━━━━━━━━━━━━━ 7秒 174毫秒/步驟 - aug_p: 0.0328 - d_loss: 0.0456 - g_loss: 3.5202 - gen_acc: 1.0000 - real_acc: 1.0000
2/46 [37m━━━━━━━━━━━━━━━━━━━━ 7秒 179毫秒/步驟 - aug_p: 0.0329 - d_loss: 0.0466 - g_loss: 3.7961 - gen_acc: 0.9980 - real_acc: 0.9980
3/46 ━ [37m━━━━━━━━━━━━━━━━━━━ 7秒 179毫秒/步驟 - aug_p: 0.0329 - d_loss: 0.0471 - g_loss: 3.9462 - gen_acc: 0.9970 - real_acc: 0.9961
4/46 ━ [37m━━━━━━━━━━━━━━━━━━━ 7秒 179毫秒/步驟 - aug_p: 0.0329 - d_loss: 0.0469 - g_loss: 4.0184 - gen_acc: 0.9967 - real_acc: 0.9946
5/46 ━━ [37m━━━━━━━━━━━━━━━━━━ 7秒 180毫秒/步驟 - aug_p: 0.0330 - d_loss: 0.0463 - g_loss: 4.0670 - gen_acc: 0.9968 - real_acc: 0.9941
6/46 ━━ [37m━━━━━━━━━━━━━━━━━━ 7秒 180毫秒/步驟 - aug_p: 0.0330 - d_loss: 0.0458 - g_loss: 4.1012 - gen_acc: 0.9969 - real_acc: 0.9938
7/46 ━━━ [37m━━━━━━━━━━━━━━━━━ 7秒 180毫秒/步驟 - aug_p: 0.0330 - d_loss: 0.0451 - g_loss: 4.1240 - gen_acc: 0.9970 - real_acc: 0.9937
8/46 ━━━ [37m━━━━━━━━━━━━━━━━━ 6秒 180毫秒/步驟 - aug_p: 0.0331 - d_loss: 0.0444 - g_loss: 4.1347 - gen_acc: 0.9971 - real_acc: 0.9938
9/46 ━━━ [37m━━━━━━━━━━━━━━━━━ 6秒 180毫秒/步驟 - aug_p: 0.0331 - d_loss: 0.0438 - g_loss: 4.1433 - gen_acc: 0.9971 - real_acc: 0.9937
10/46 ━━━━ [37m━━━━━━━━━━━━━━━━ 6秒 180毫秒/步驟 - aug_p: 0.0331 - d_loss: 0.0434 - g_loss: 4.1560 - gen_acc: 0.9970 - real_acc: 0.9936
11/46 ━━━━ [37m━━━━━━━━━━━━━━━━ 6秒 180毫秒/步驟 - aug_p: 0.0332 - d_loss: 0.0431 - g_loss: 4.1654 - gen_acc: 0.9969 - real_acc: 0.9936
12/46 ━━━━━ [37m━━━━━━━━━━━━━━━ 6秒 180毫秒/步驟 - aug_p: 0.0332 - d_loss: 0.0429 - g_loss: 4.1695 - gen_acc: 0.9969 - real_acc: 0.9935
13/46 ━━━━━ [37m━━━━━━━━━━━━━━━ 5秒 180毫秒/步驟 - aug_p: 0.0333 - d_loss: 0.0428 - g_loss: 4.1758 - gen_acc: 0.9969 - real_acc: 0.9934
14/46 ━━━━━━ [37m━━━━━━━━━━━━━━ 5秒 180毫秒/步驟 - aug_p: 0.0333 - d_loss: 0.0427 - g_loss: 4.1789 - gen_acc: 0.9969 - real_acc: 0.9932
15/46 ━━━━━━ [37m━━━━━━━━━━━━━━ 5秒 180毫秒/步驟 - aug_p: 0.0333 - d_loss: 0.0426 - g_loss: 4.1799 - gen_acc: 0.9970 - real_acc: 0.9929
16/46 ━━━━━━ [37m━━━━━━━━━━━━━━ 5秒 180毫秒/步驟 - aug_p: 0.0334 - d_loss: 0.0425 - g_loss: 4.1823 - gen_acc: 0.9970 - real_acc: 0.9927
17/46 ━━━━━━━ [37m━━━━━━━━━━━━━ 5秒 180毫秒/步驟 - aug_p: 0.0334 - d_loss: 0.0425 - g_loss: 4.1836 - gen_acc: 0.9970 - real_acc: 0.9926
18/46 ━━━━━━━ [37m━━━━━━━━━━━━━ 5秒 180毫秒/步驟 - aug_p: 0.0334 - d_loss: 0.0425 - g_loss: 4.1854 - gen_acc: 0.9971 - real_acc: 0.9923
19/46 ━━━━━━━━ [37m━━━━━━━━━━━━ 4秒 180毫秒/步驟 - aug_p: 0.0335 - d_loss: 0.0426 - g_loss: 4.1843 - gen_acc: 0.9971 - real_acc: 0.9921
20/46 ━━━━━━━━ [37m━━━━━━━━━━━━ 4秒 180毫秒/步驟 - aug_p: 0.0335 - d_loss: 0.0427 - g_loss: 4.1873 - gen_acc: 0.9971 - real_acc: 0.9920
21/46 ━━━━━━━━━ [37m━━━━━━━━━━━ 4秒 180毫秒/步驟 - aug_p: 0.0335 - d_loss: 0.0427 - g_loss: 4.1927 - gen_acc: 0.9972 - real_acc: 0.9918
22/46 ━━━━━━━━━ [37m━━━━━━━━━━━ 4秒 180毫秒/步驟 - aug_p: 0.0336 - d_loss: 0.0428 - g_loss: 4.1952 - gen_acc: 0.9972 - real_acc: 0.9916
23/46 ━━━━━━━━━━ [37m━━━━━━━━━━ 4秒 180毫秒/步驟 - aug_p: 0.0336 - d_loss: 0.0428 - g_loss: 4.2017 - gen_acc: 0.9972 - real_acc: 0.9915
24/46 ━━━━━━━━━━ [37m━━━━━━━━━━ 3秒 180毫秒/步驟 - aug_p: 0.0336 - d_loss: 0.0428 - g_loss: 4.2106 - gen_acc: 0.9972 - real_acc: 0.9914
25/46 ━━━━━━━━━━ [37m━━━━━━━━━━ 3秒 180毫秒/步驟 - aug_p: 0.0337 - d_loss: 0.0428 - g_loss: 4.2181 - gen_acc: 0.9972 - real_acc: 0.9913
26/46 ━━━━━━━━━━━ [37m━━━━━━━━━ 3秒 180毫秒/步驟 - aug_p: 0.0337 - d_loss: 0.0428 - g_loss: 4.2229 - gen_acc: 0.9972 - real_acc: 0.9912
27/46 ━━━━━━━━━━━ [37m━━━━━━━━━ 3秒 180毫秒/步驟 - aug_p: 0.0337 - d_loss: 0.0429 - g_loss: 4.2318 - gen_acc: 0.9972 - real_acc: 0.9911
28/46 ━━━━━━━━━━━━ [37m━━━━━━━━ 3秒 180毫秒/步驟 - aug_p: 0.0338 - d_loss: 0.0429 - g_loss: 4.2416 - gen_acc: 0.9972 - real_acc: 0.9910
29/46 ━━━━━━━━━━━━ [37m━━━━━━━━ 3秒 180毫秒/步驟 - aug_p: 0.0338 - d_loss: 0.0430 - g_loss: 4.2491 - gen_acc: 0.9971 - real_acc: 0.9909
30/46 ━━━━━━━━━━━━━ [37m━━━━━━━ 2秒 180毫秒/步驟 - aug_p: 0.0338 - d_loss: 0.0430 - g_loss: 4.2604 - gen_acc: 0.9971 - real_acc: 0.9908
31/46 ━━━━━━━━━━━━━ [37m━━━━━━━ 2秒 180毫秒/步驟 - aug_p: 0.0339 - d_loss: 0.0431 - g_loss: 4.2736 - gen_acc: 0.9971 - real_acc: 0.9907
32/46 ━━━━━━━━━━━━━ [37m━━━━━━━ 2秒 180毫秒/步驟 - aug_p: 0.0339 - d_loss: 0.0432 - g_loss: 4.2834 - gen_acc: 0.9970 - real_acc: 0.9906
33/46 ━━━━━━━━━━━━━━ [37m━━━━━━ 2秒 180毫秒/步驟 - aug_p: 0.0339 - d_loss: 0.0439 - g_loss: 4.3010 - gen_acc: 0.9968 - real_acc: 0.9901
34/46 ━━━━━━━━━━━━━━ [37m━━━━━━ 2秒 180毫秒/步驟 - aug_p: 0.0340 - d_loss: 0.0444 - g_loss: 4.3187 - gen_acc: 0.9967 - real_acc: 0.9897
35/46 ━━━━━━━━━━━━━━━ [37m━━━━━ 1秒 180毫秒/步驟 - aug_p: 0.0340 - d_loss: 0.0455 - g_loss: 4.3319 - gen_acc: 0.9961 - real_acc: 0.9892
36/46 ━━━━━━━━━━━━━━━ [37m━━━━━ 1秒 180毫秒/步驟 - aug_p: 0.0340 - d_loss: 0.0464 - g_loss: 4.3508 - gen_acc: 0.9956 - real_acc: 0.9889
37/46 ━━━━━━━━━━━━━━━━ [37m━━━━ 1秒 180毫秒/步驟 - aug_p: 0.0341 - d_loss: 0.0474 - g_loss: 4.3765 - gen_acc: 0.9951 - real_acc: 0.9884
38/46 ━━━━━━━━━━━━━━━━ [37m━━━━ 1秒 180毫秒/步驟 - aug_p: 0.0341 - d_loss: 0.0483 - g_loss: 4.4070 - gen_acc: 0.9947 - real_acc: 0.9880
39/46 ━━━━━━━━━━━━━━━━ [37m━━━━ 1秒 180毫秒/步驟 - aug_p: 0.0341 - d_loss: 0.0492 - g_loss: 4.4400 - gen_acc: 0.9943 - real_acc: 0.9875
40/46 ━━━━━━━━━━━━━━━━━ [37m━━━ 1秒 180毫秒/步驟 - aug_p: 0.0342 - d_loss: 0.0499 - g_loss: 4.4739 - gen_acc: 0.9939 - real_acc: 0.9872
41/46 ━━━━━━━━━━━━━━━━━ [37m━━━ 0秒 180毫秒/步驟 - aug_p: 0.0342 - d_loss: 0.0506 - g_loss: 4.5070 - gen_acc: 0.9935 - real_acc: 0.9868
42/46 ━━━━━━━━━━━━━━━━━━ [37m━━ 0秒 180毫秒/步驟 - aug_p: 0.0342 - d_loss: 0.0513 - g_loss: 4.5375 - gen_acc: 0.9932 - real_acc: 0.9865
43/46 ━━━━━━━━━━━━━━━━━━ [37m━━ 0秒 180毫秒/步驟 - aug_p: 0.0343 - d_loss: 0.0519 - g_loss: 4.5646 - gen_acc: 0.9929 - real_acc: 0.9862
44/46 ━━━━━━━━━━━━━━━━━━━ [37m━ 0秒 180毫秒/步驟 - aug_p: 0.0343 - d_loss: 0.0525 - g_loss: 4.5904 - gen_acc: 0.9925 - real_acc: 0.9859
45/46 ━━━━━━━━━━━━━━━━━━━ [37m━ 0秒 180毫秒/步驟 - aug_p: 0.0343 - d_loss: 0.0530 - g_loss: 4.6149 - gen_acc: 0.9923 - real_acc: 0.9857
46/46 ━━━━━━━━━━━━━━━━━━━━ 0秒 180毫秒/步驟 - aug_p: 0.0344 - d_loss: 0.0536 - g_loss: 4.6368 - gen_acc: 0.9920 - real_acc: 0.9854
46/46 ━━━━━━━━━━━━━━━━━━━━ 13秒 294毫秒/步驟 - aug_p: 0.0344 - d_loss: 0.0542 - g_loss: 4.6579 - gen_acc: 0.9917 - real_acc: 0.9852 - val_kid: 6.7378
Epoch 8/10
1/46 [37m━━━━━━━━━━━━━━━━━━━━ 7秒 167毫秒/步驟 - aug_p: 0.0384 - d_loss: 0.1191 - g_loss: 4.3279 - gen_acc: 1.0000 - real_acc: 0.9219
2/46 [37m━━━━━━━━━━━━━━━━━━━━ 7秒 179毫秒/步驟 - aug_p: 0.0384 - d_loss: 0.1470 - g_loss: 3.7525 - gen_acc: 0.9590 - real_acc: 0.9219
3/46 ━ [37m━━━━━━━━━━━━━━━━━━━ 7秒 180毫秒/步驟 - aug_p: 0.0384 - d_loss: 0.1768 - g_loss: 4.0819 - gen_acc: 0.9544 - real_acc: 0.8950
4/46 ━ [37m━━━━━━━━━━━━━━━━━━━ 7秒 180毫秒/步驟 - aug_p: 0.0384 - d_loss: 0.1801 - g_loss: 4.1693 - gen_acc: 0.9551 - real_acc: 0.8910
5/46 ━━ [37m━━━━━━━━━━━━━━━━━━ 7秒 180毫秒/步驟 - aug_p: 0.0384 - d_loss: 0.1829 - g_loss: 4.1280 - gen_acc: 0.9491 - real_acc: 0.8934
6/46 ━━ [37m━━━━━━━━━━━━━━━━━━ 7秒 180毫秒/步驟 - aug_p: 0.0384 - d_loss: 0.1828 - g_loss: 4.2346 - gen_acc: 0.9471 - real_acc: 0.8949
7/46 ━━━ [37m━━━━━━━━━━━━━━━━━ 7秒 180毫秒/步驟 - aug_p: 0.0385 - d_loss: 0.1806 - g_loss: 4.3823 - gen_acc: 0.9470 - real_acc: 0.8968
8/46 ━━━ [37m━━━━━━━━━━━━━━━━━ 6秒 180毫秒/步驟 - aug_p: 0.0385 - d_loss: 0.1765 - g_loss: 4.5079 - gen_acc: 0.9478 - real_acc: 0.8997
9/46 ━━━ [37m━━━━━━━━━━━━━━━━━ 6秒 180毫秒/步驟 - aug_p: 0.0385 - d_loss: 0.1723 - g_loss: 4.5814 - gen_acc: 0.9486 - real_acc: 0.9028
10/46 ━━━━ [37m━━━━━━━━━━━━━━━━ 6秒 180毫秒/步驟 - aug_p: 0.0385 - d_loss: 0.1679 - g_loss: 4.6213 - gen_acc: 0.9496 - real_acc: 0.9061
11/46 ━━━━ [37m━━━━━━━━━━━━━━━━ 6秒 180毫秒/步驟 - aug_p: 0.0385 - d_loss: 0.1637 - g_loss: 4.6466 - gen_acc: 0.9507 - real_acc: 0.9092
12/46 ━━━━━ [37m━━━━━━━━━━━━━━━ 6秒 180毫秒/步驟 - aug_p: 0.0386 - d_loss: 0.1595 - g_loss: 4.6599 - gen_acc: 0.9520 - real_acc: 0.9122
13/46 ━━━━━ [37m━━━━━━━━━━━━━━━ 5秒 180毫秒/步驟 - aug_p: 0.0386 - d_loss: 0.1561 - g_loss: 4.6625 - gen_acc: 0.9531 - real_acc: 0.9148
14/46 ━━━━━━ [37m━━━━━━━━━━━━━━ 5秒 180毫秒/步驟 - aug_p: 0.0386 - d_loss: 0.1535 - g_loss: 4.6513 - gen_acc: 0.9537 - real_acc: 0.9172
15/46 ━━━━━━ [37m━━━━━━━━━━━━━━ 5秒 180毫秒/步驟 - aug_p: 0.0386 - d_loss: 0.1530 - g_loss: 4.6600 - gen_acc: 0.9544 - real_acc: 0.9175
16/46 ━━━━━━ [37m━━━━━━━━━━━━━━ 5秒 180毫秒/步驟 - aug_p: 0.0387 - d_loss: 0.1612 - g_loss: 4.6490 - gen_acc: 0.9512 - real_acc: 0.9180
17/46 ━━━━━━━ [37m━━━━━━━━━━━━━ 5秒 180毫秒/步驟 - aug_p: 0.0387 - d_loss: 0.1727 - g_loss: 4.6715 - gen_acc: 0.9488 - real_acc: 0.9157
18/46 ━━━━━━━ [37m━━━━━━━━━━━━━ 5秒 180毫秒/步驟 - aug_p: 0.0387 - d_loss: 0.1825 - g_loss: 4.7072 - gen_acc: 0.9469 - real_acc: 0.9135
19/46 ━━━━━━━━ [37m━━━━━━━━━━━━ 4秒 180毫秒/步驟 - aug_p: 0.0387 - d_loss: 0.1904 - g_loss: 4.7428 - gen_acc: 0.9454 - real_acc: 0.9118
20/46 ━━━━━━━━ [37m━━━━━━━━━━━━ 4秒 179毫秒/步驟 - aug_p: 0.0387 - d_loss: 0.1970 - g_loss: 4.7693 - gen_acc: 0.9440 - real_acc: 0.9106
21/46 ━━━━━━━━━ [37m━━━━━━━━━━━ 4秒 179毫秒/步驟 - aug_p: 0.0387 - d_loss: 0.2029 - g_loss: 4.7854 - gen_acc: 0.9424 - real_acc: 0.9098
22/46 ━━━━━━━━━ [37m━━━━━━━━━━━ 4秒 180毫秒/步驟 - aug_p: 0.0387 - d_loss: 0.2079 - g_loss: 4.7960 - gen_acc: 0.9409 - real_acc: 0.9092
23/46 ━━━━━━━━━━ [37m━━━━━━━━━━ 4秒 180毫秒/步驟 - aug_p: 0.0388 - d_loss: 0.2119 - g_loss: 4.8033 - gen_acc: 0.9397 - real_acc: 0.9090
24/46 ━━━━━━━━━━ [37m━━━━━━━━━━ 3秒 179毫秒/步驟 - aug_p: 0.0388 - d_loss: 0.2153 - g_loss: 4.8076 - gen_acc: 0.9387 - real_acc: 0.9088
25/46 ━━━━━━━━━━ [37m━━━━━━━━━━ 3秒 179毫秒/步驟 - aug_p: 0.0388 - d_loss: 0.2182 - g_loss: 4.8077 - gen_acc: 0.9378 - real_acc: 0.9087
26/46 ━━━━━━━━━━━ [37m━━━━━━━━━ 3秒 179毫秒/步驟 - aug_p: 0.0388 - d_loss: 0.2207 - g_loss: 4.8051 - gen_acc: 0.9371 - real_acc: 0.9087
27/46 ━━━━━━━━━━━ [37m━━━━━━━━━ 3秒 179毫秒/步驟 - aug_p: 0.0388 - d_loss: 0.2229 - g_loss: 4.8007 - gen_acc: 0.9365 - real_acc: 0.9086
28/46 ━━━━━━━━━━━━ [37m━━━━━━━━ 3秒 180毫秒/步驟 - aug_p: 0.0388 - d_loss: 0.2249 - g_loss: 4.7934 - gen_acc: 0.9360 - real_acc: 0.9086
29/46 ━━━━━━━━━━━━ [37m━━━━━━━━ 3秒 180毫秒/步驟 - aug_p: 0.0388 - d_loss: 0.2265 - g_loss: 4.7860 - gen_acc: 0.9355 - real_acc: 0.9086
30/46 ━━━━━━━━━━━━━ [37m━━━━━━━ 2秒 180毫秒/步驟 - aug_p: 0.0389 - d_loss: 0.2278 - g_loss: 4.7775 - gen_acc: 0.9352 - real_acc: 0.9087
31/46 ━━━━━━━━━━━━━ [37m━━━━━━━ 2秒 180毫秒/步驟 - aug_p: 0.0389 - d_loss: 0.2290 - g_loss: 4.7677 - gen_acc: 0.9349 - real_acc: 0.9087
32/46 ━━━━━━━━━━━━━ [37m━━━━━━━ 2秒 180毫秒/步驟 - aug_p: 0.0389 - d_loss: 0.2299 - g_loss: 4.7575 - gen_acc: 0.9347 - real_acc: 0.9089
33/46 ━━━━━━━━━━━━━━ [37m━━━━━━ 2秒 180毫秒/步驟 - aug_p: 0.0389 - d_loss: 0.2305 - g_loss: 4.7470 - gen_acc: 0.9346 - real_acc: 0.9091
34/46 ━━━━━━━━━━━━━━ [37m━━━━━━ 2秒 180毫秒/步驟 - aug_p: 0.0389 - d_loss: 0.2310 - g_loss: 4.7363 - gen_acc: 0.9345 - real_acc: 0.9093
35/46 ━━━━━━━━━━━━━━━ [37m━━━━━ 1秒 180毫秒/步驟 - aug_p: 0.0389 - d_loss: 0.2314 - g_loss: 4.7249 - gen_acc: 0.9344 - real_acc: 0.9095
36/46 ━━━━━━━━━━━━━━━ [37m━━━━━ 1秒 180毫秒/步驟 - aug_p: 0.0389 - d_loss: 0.2317 - g_loss: 4.7149 - gen_acc: 0.9344 - real_acc: 0.9098
37/46 ━━━━━━━━━━━━━━━━ [37m━━━━ 1秒 180毫秒/步驟 - aug_p: 0.0390 - d_loss: 0.2319 - g_loss: 4.7045 - gen_acc: 0.9345 - real_acc: 0.9101
38/46 ━━━━━━━━━━━━━━━━ [37m━━━━ 1秒 180毫秒/步驟 - aug_p: 0.0390 - d_loss: 0.2319 - g_loss: 4.6937 - gen_acc: 0.9345 - real_acc: 0.9104
39/46 ━━━━━━━━━━━━━━━━ [37m━━━━ 1秒 179毫秒/步驟 - aug_p: 0.0390 - d_loss: 0.2319 - g_loss: 4.6838 - gen_acc: 0.9346 - real_acc: 0.9107
40/46 ━━━━━━━━━━━━━━━━━ [37m━━━ 1秒 179毫秒/步驟 - aug_p: 0.0390 - d_loss: 0.2318 - g_loss: 4.6734 - gen_acc: 0.9347 - real_acc: 0.9110
41/46 ━━━━━━━━━━━━━━━━━ [37m━━━ 0秒 179毫秒/步驟 - aug_p: 0.0390 - d_loss: 0.2316 - g_loss: 4.6636 - gen_acc: 0.9349 - real_acc: 0.9114
42/46 ━━━━━━━━━━━━━━━━━━ [37m━━ 0秒 179毫秒/步驟 - aug_p: 0.0390 - d_loss: 0.2313 - g_loss: 4.6532 - gen_acc: 0.9350 - real_acc: 0.9117
43/46 ━━━━━━━━━━━━━━━━━━ [37m━━ 0秒 180毫秒/步驟 - aug_p: 0.0391 - d_loss: 0.2310 - g_loss: 4.6442 - gen_acc: 0.9352 - real_acc: 0.9120
44/46 ━━━━━━━━━━━━━━━━━━━ [37m━ 0秒 180毫秒/步驟 - aug_p: 0.0391 - d_loss: 0.2306 - g_loss: 4.6361 - gen_acc: 0.9354 - real_acc: 0.9124
45/46 ━━━━━━━━━━━━━━━━━━━ [37m━ 0秒 180毫秒/步驟 - aug_p: 0.0391 - d_loss: 0.2302 - g_loss: 4.6279 - gen_acc: 0.9356 - real_acc: 0.9127
46/46 ━━━━━━━━━━━━━━━━━━━━ 0秒 180毫秒/步驟 - aug_p: 0.0391 - d_loss: 0.2297 - g_loss: 4.6201 - gen_acc: 0.9358 - real_acc: 0.9131
46/46 ━━━━━━━━━━━━━━━━━━━━ 12秒 266毫秒/步驟 - aug_p: 0.0391 - d_loss: 0.2292 - g_loss: 4.6126 - gen_acc: 0.9361 - real_acc: 0.9134 - val_kid: 5.7109
Epoch 9/10
1/46 [37m━━━━━━━━━━━━━━━━━━━━ 8秒 180毫秒/步驟 - aug_p: 0.0422 - d_loss: 0.0668 - g_loss: 3.8939 - gen_acc: 0.9922 - real_acc: 0.9922
2/46 [37m━━━━━━━━━━━━━━━━━━━━ 8秒 187毫秒/步驟 - aug_p: 0.0422 - d_loss: 0.0676 - g_loss: 3.8295 - gen_acc: 0.9863 - real_acc: 0.9941
3/46 ━ [37m━━━━━━━━━━━━━━━━━━━ 7秒 185毫秒/步驟 - aug_p: 0.0422 - d_loss: 0.0659 - g_loss: 3.8676 - gen_acc: 0.9865 - real_acc: 0.9944
4/46 ━ [37m━━━━━━━━━━━━━━━━━━━ 7秒 183毫秒/步驟 - aug_p: 0.0423 - d_loss: 0.0703 - g_loss: 3.8084 - gen_acc: 0.9831 - real_acc: 0.9928
5/46 ━━ [37m━━━━━━━━━━━━━━━━━━ 7秒 183毫秒/步驟 - aug_p: 0.0423 - d_loss: 0.0755 - g_loss: 3.9384 - gen_acc: 0.9821 - real_acc: 0.9880
6/46 ━━ [37m━━━━━━━━━━━━━━━━━━ 7秒 183毫秒/步驟 - aug_p: 0.0423 - d_loss: 0.0781 - g_loss: 4.0291 - gen_acc: 0.9818 - real_acc: 0.9846
7/46 ━━━ [37m━━━━━━━━━━━━━━━━━ 7秒 182毫秒/步驟 - aug_p: 0.0424 - d_loss: 0.0831 - g_loss: 4.0366 - gen_acc: 0.9779 - real_acc: 0.9828
8/46 ━━━ [37m━━━━━━━━━━━━━━━━━ 6秒 182毫秒/步驟 - aug_p: 0.0424 - d_loss: 0.0888 - g_loss: 4.1585 - gen_acc: 0.9756 - real_acc: 0.9782
9/46 ━━━ [37m━━━━━━━━━━━━━━━━━ 6秒 182毫秒/步驟 - aug_p: 0.0424 - d_loss: 0.0921 - g_loss: 4.3258 - gen_acc: 0.9744 - real_acc: 0.9750
10/46 ━━━━ [37m━━━━━━━━━━━━━━━━ 6秒 182毫秒/步驟 - aug_p: 0.0424 - d_loss: 0.0937 - g_loss: 4.4967 - gen_acc: 0.9737 - real_acc: 0.9729
11/46 ━━━━ [37m━━━━━━━━━━━━━━━━ 6秒 182毫秒/步驟 - aug_p: 0.0425 - d_loss: 0.0944 - g_loss: 4.6444 - gen_acc: 0.9732 - real_acc: 0.9715
12/46 ━━━━━ [37m━━━━━━━━━━━━━━━ 6秒 181毫秒/步驟 - aug_p: 0.0425 - d_loss: 0.0945 - g_loss: 4.7625 - gen_acc: 0.9730 - real_acc: 0.9706
13/46 ━━━━━ [37m━━━━━━━━━━━━━━━ 5秒 181毫秒/步驟 - aug_p: 0.0425 - d_loss: 0.0943 - g_loss: 4.8487 - gen_acc: 0.9728 - real_acc: 0.9701
14/46 ━━━━━━ [37m━━━━━━━━━━━━━━ 5秒 181毫秒/步驟 - aug_p: 0.0425 - d_loss: 0.0940 - g_loss: 4.9110 - gen_acc: 0.9726 - real_acc: 0.9698
15/46 ━━━━━━ [37m━━━━━━━━━━━━━━ 5秒 181毫秒/步驟 - aug_p: 0.0426 - d_loss: 0.0935 - g_loss: 4.9645 - gen_acc: 0.9725 - real_acc: 0.9696
16/46 ━━━━━━ [37m━━━━━━━━━━━━━━ 5秒 181毫秒/步驟 - aug_p: 0.0426 - d_loss: 0.0931 - g_loss: 5.0047 - gen_acc: 0.9726 - real_acc: 0.9694
17/46 ━━━━━━━ [37m━━━━━━━━━━━━━ 5秒 181毫秒/步驟 - aug_p: 0.0426 - d_loss: 0.0930 - g_loss: 5.0287 - gen_acc: 0.9723 - real_acc: 0.9693
18/46 ━━━━━━━ [37m━━━━━━━━━━━━━ 5秒 181毫秒/步驟 - aug_p: 0.0426 - d_loss: 0.0941 - g_loss: 5.0578 - gen_acc: 0.9721 - real_acc: 0.9679
19/46 ━━━━━━━━ [37m━━━━━━━━━━━━ 4秒 181毫秒/步驟 - aug_p: 0.0427 - d_loss: 0.0976 - g_loss: 5.0709 - gen_acc: 0.9702 - real_acc: 0.9669
20/46 ━━━━━━━━ [37m━━━━━━━━━━━━ 4秒 181毫秒/步驟 - aug_p: 0.0427 - d_loss: 0.1023 - g_loss: 5.0961 - gen_acc: 0.9687 - real_acc: 0.9645
21/46 ━━━━━━━━━ [37m━━━━━━━━━━━ 4秒 181毫秒/步驟 - aug_p: 0.0427 - d_loss: 0.1064 - g_loss: 5.1232 - gen_acc: 0.9674 - real_acc: 0.9623
22/46 ━━━━━━━━━ [37m━━━━━━━━━━━ 4秒 181毫秒/步驟 - aug_p: 0.0427 - d_loss: 0.1101 - g_loss: 5.1442 - gen_acc: 0.9662 - real_acc: 0.9603
23/46 ━━━━━━━━━━ [37m━━━━━━━━━━ 4秒 181毫秒/步驟 - aug_p: 0.0428 - d_loss: 0.1136 - g_loss: 5.1570 - gen_acc: 0.9649 - real_acc: 0.9587
24/46 ━━━━━━━━━━ [37m━━━━━━━━━━ 3秒 181毫秒/步驟 - aug_p: 0.0428 - d_loss: 0.1166 - g_loss: 5.1674 - gen_acc: 0.9638 - real_acc: 0.9573
25/46 ━━━━━━━━━━ [37m━━━━━━━━━━ 3秒 181毫秒/步驟 - aug_p: 0.0428 - d_loss: 0.1192 - g_loss: 5.1751 - gen_acc: 0.9628 - real_acc: 0.9561
26/46 ━━━━━━━━━━━ [37m━━━━━━━━━ 3秒 180毫秒/步 - aug_p: 0.0428 - d_loss: 0.1216 - g_loss: 5.1786 - gen_acc: 0.9620 - real_acc: 0.9550
27/46 ━━━━━━━━━━━ [37m━━━━━━━━━ 3秒 180毫秒/步 - aug_p: 0.0428 - d_loss: 0.1238 - g_loss: 5.1785 - gen_acc: 0.9612 - real_acc: 0.9539
28/46 ━━━━━━━━━━━━ [37m━━━━━━━━ 3秒 180毫秒/步 - aug_p: 0.0429 - d_loss: 0.1258 - g_loss: 5.1765 - gen_acc: 0.9605 - real_acc: 0.9530
29/46 ━━━━━━━━━━━━ [37m━━━━━━━━ 3秒 180毫秒/步 - aug_p: 0.0429 - d_loss: 0.1276 - g_loss: 5.1726 - gen_acc: 0.9599 - real_acc: 0.9521
30/46 ━━━━━━━━━━━━━ [37m━━━━━━━ 2秒 180毫秒/步 - aug_p: 0.0429 - d_loss: 0.1294 - g_loss: 5.1667 - gen_acc: 0.9595 - real_acc: 0.9513
31/46 ━━━━━━━━━━━━━ [37m━━━━━━━ 2秒 180毫秒/步 - aug_p: 0.0429 - d_loss: 0.1309 - g_loss: 5.1594 - gen_acc: 0.9590 - real_acc: 0.9506
32/46 ━━━━━━━━━━━━━ [37m━━━━━━━ 2秒 180毫秒/步 - aug_p: 0.0429 - d_loss: 0.1323 - g_loss: 5.1512 - gen_acc: 0.9587 - real_acc: 0.9500
33/46 ━━━━━━━━━━━━━━ [37m━━━━━━ 2秒 180毫秒/步 - aug_p: 0.0429 - d_loss: 0.1335 - g_loss: 5.1414 - gen_acc: 0.9584 - real_acc: 0.9494
34/46 ━━━━━━━━━━━━━━ [37m━━━━━━ 2秒 180毫秒/步 - aug_p: 0.0430 - d_loss: 0.1346 - g_loss: 5.1320 - gen_acc: 0.9582 - real_acc: 0.9489
35/46 ━━━━━━━━━━━━━━━ [37m━━━━━ 1秒 180毫秒/步 - aug_p: 0.0430 - d_loss: 0.1356 - g_loss: 5.1216 - gen_acc: 0.9580 - real_acc: 0.9484
36/46 ━━━━━━━━━━━━━━━ [37m━━━━━ 1秒 180毫秒/步 - aug_p: 0.0430 - d_loss: 0.1365 - g_loss: 5.1109 - gen_acc: 0.9579 - real_acc: 0.9479
37/46 ━━━━━━━━━━━━━━━━ [37m━━━━ 1秒 180毫秒/步 - aug_p: 0.0430 - d_loss: 0.1373 - g_loss: 5.0996 - gen_acc: 0.9578 - real_acc: 0.9475
38/46 ━━━━━━━━━━━━━━━━ [37m━━━━ 1秒 180毫秒/步 - aug_p: 0.0430 - d_loss: 0.1379 - g_loss: 5.0882 - gen_acc: 0.9577 - real_acc: 0.9472
39/46 ━━━━━━━━━━━━━━━━ [37m━━━━ 1秒 180毫秒/步 - aug_p: 0.0431 - d_loss: 0.1385 - g_loss: 5.0769 - gen_acc: 0.9577 - real_acc: 0.9468
40/46 ━━━━━━━━━━━━━━━━━ [37m━━━ 1秒 180毫秒/步 - aug_p: 0.0431 - d_loss: 0.1391 - g_loss: 5.0648 - gen_acc: 0.9577 - real_acc: 0.9466
41/46 ━━━━━━━━━━━━━━━━━ [37m━━━ 0秒 180毫秒/步 - aug_p: 0.0431 - d_loss: 0.1395 - g_loss: 5.0535 - gen_acc: 0.9577 - real_acc: 0.9463
42/46 ━━━━━━━━━━━━━━━━━━ [37m━━ 0秒 180毫秒/步 - aug_p: 0.0431 - d_loss: 0.1400 - g_loss: 5.0419 - gen_acc: 0.9576 - real_acc: 0.9461
43/46 ━━━━━━━━━━━━━━━━━━ [37m━━ 0秒 180毫秒/步 - aug_p: 0.0431 - d_loss: 0.1403 - g_loss: 5.0307 - gen_acc: 0.9577 - real_acc: 0.9459
44/46 ━━━━━━━━━━━━━━━━━━━ [37m━ 0秒 180毫秒/步 - aug_p: 0.0431 - d_loss: 0.1406 - g_loss: 5.0198 - gen_acc: 0.9577 - real_acc: 0.9458
45/46 ━━━━━━━━━━━━━━━━━━━ [37m━ 0秒 180毫秒/步 - aug_p: 0.0432 - d_loss: 0.1408 - g_loss: 5.0087 - gen_acc: 0.9577 - real_acc: 0.9456
46/46 ━━━━━━━━━━━━━━━━━━━━ 0秒 180毫秒/步 - aug_p: 0.0432 - d_loss: 0.1410 - g_loss: 4.9981 - gen_acc: 0.9578 - real_acc: 0.9455
46/46 ━━━━━━━━━━━━━━━━━━━━ 14秒 300毫秒/步 - aug_p: 0.0432 - d_loss: 0.1411 - g_loss: 4.9879 - gen_acc: 0.9579 - real_acc: 0.9455 - val_kid: 3.6018
Epoch 10/10
1/46 [37m━━━━━━━━━━━━━━━━━━━━ 5:15 7秒/步 - aug_p: 0.0464 - d_loss: 0.0324 - g_loss: 4.1750 - gen_acc: 1.0000 - real_acc: 0.9922
2/46 [37m━━━━━━━━━━━━━━━━━━━━ 8秒 195毫秒/步 - aug_p: 0.0464 - d_loss: 0.0337 - g_loss: 4.0349 - gen_acc: 0.9980 - real_acc: 0.9941
3/46 ━ [37m━━━━━━━━━━━━━━━━━━━ 8秒 186毫秒/步 - aug_p: 0.0464 - d_loss: 0.0367 - g_loss: 4.0199 - gen_acc: 0.9978 - real_acc: 0.9918
4/46 ━ [37m━━━━━━━━━━━━━━━━━━━ 7秒 184毫秒/步 - aug_p: 0.0465 - d_loss: 0.0374 - g_loss: 4.0297 - gen_acc: 0.9979 - real_acc: 0.9909
5/46 ━━ [37m━━━━━━━━━━━━━━━━━━ 7秒 183毫秒/步 - aug_p: 0.0465 - d_loss: 0.0380 - g_loss: 4.0271 - gen_acc: 0.9980 - real_acc: 0.9902
6/46 ━━ [37m━━━━━━━━━━━━━━━━━━ 7秒 183毫秒/步 - aug_p: 0.0465 - d_loss: 0.0383 - g_loss: 4.0130 - gen_acc: 0.9981 - real_acc: 0.9901
7/46 ━━━ [37m━━━━━━━━━━━━━━━━━ 7秒 183毫秒/步 - aug_p: 0.0466 - d_loss: 0.0385 - g_loss: 4.0148 - gen_acc: 0.9982 - real_acc: 0.9901
8/46 ━━━ [37m━━━━━━━━━━━━━━━━━ 6秒 182毫秒/步 - aug_p: 0.0466 - d_loss: 0.0389 - g_loss: 4.0141 - gen_acc: 0.9983 - real_acc: 0.9902
9/46 ━━━ [37m━━━━━━━━━━━━━━━━━ 6秒 182毫秒/步 - aug_p: 0.0467 - d_loss: 0.0393 - g_loss: 4.0076 - gen_acc: 0.9984 - real_acc: 0.9903
10/46 ━━━━ [37m━━━━━━━━━━━━━━━━ 6秒 182毫秒/步 - aug_p: 0.0467 - d_loss: 0.0397 - g_loss: 4.0031 - gen_acc: 0.9985 - real_acc: 0.9903
11/46 ━━━━ [37m━━━━━━━━━━━━━━━━ 6秒 182毫秒/步 - aug_p: 0.0467 - d_loss: 0.0402 - g_loss: 3.9981 - gen_acc: 0.9985 - real_acc: 0.9902
12/46 ━━━━━ [37m━━━━━━━━━━━━━━━ 6秒 182毫秒/步 - aug_p: 0.0468 - d_loss: 0.0406 - g_loss: 3.9968 - gen_acc: 0.9985 - real_acc: 0.9902
13/46 ━━━━━ [37m━━━━━━━━━━━━━━━ 5秒 181毫秒/步 - aug_p: 0.0468 - d_loss: 0.0411 - g_loss: 3.9967 - gen_acc: 0.9985 - real_acc: 0.9899
14/46 ━━━━━━ [37m━━━━━━━━━━━━━━ 5秒 181毫秒/步 - aug_p: 0.0468 - d_loss: 0.0418 - g_loss: 3.9930 - gen_acc: 0.9984 - real_acc: 0.9897
15/46 ━━━━━━ [37m━━━━━━━━━━━━━━ 5秒 181毫秒/步 - aug_p: 0.0469 - d_loss: 0.0428 - g_loss: 3.9956 - gen_acc: 0.9982 - real_acc: 0.9893
16/46 ━━━━━━ [37m━━━━━━━━━━━━━━ 5秒 181毫秒/步 - aug_p: 0.0469 - d_loss: 0.0436 - g_loss: 3.9957 - gen_acc: 0.9980 - real_acc: 0.9890
17/46 ━━━━━━━ [37m━━━━━━━━━━━━━ 5秒 180毫秒/步 - aug_p: 0.0469 - d_loss: 0.0443 - g_loss: 3.9983 - gen_acc: 0.9978 - real_acc: 0.9887
18/46 ━━━━━━━ [37m━━━━━━━━━━━━━ 5秒 180毫秒/步 - aug_p: 0.0470 - d_loss: 0.0450 - g_loss: 3.9978 - gen_acc: 0.9977 - real_acc: 0.9885
19/46 ━━━━━━━━ [37m━━━━━━━━━━━━ 4秒 180毫秒/步 - aug_p: 0.0470 - d_loss: 0.0457 - g_loss: 3.9987 - gen_acc: 0.9976 - real_acc: 0.9883
20/46 ━━━━━━━━ [37m━━━━━━━━━━━━ 4秒 180毫秒/步 - aug_p: 0.0470 - d_loss: 0.0464 - g_loss: 3.9966 - gen_acc: 0.9974 - real_acc: 0.9880
21/46 ━━━━━━━━━ [37m━━━━━━━━━━━ 4秒 180毫秒/步 - aug_p: 0.0471 - d_loss: 0.0472 - g_loss: 3.9956 - gen_acc: 0.9973 - real_acc: 0.9877
22/46 ━━━━━━━━━ [37m━━━━━━━━━━━ 4秒 180毫秒/步 - aug_p: 0.0471 - d_loss: 0.0482 - g_loss: 3.9910 - gen_acc: 0.9969 - real_acc: 0.9874
23/46 ━━━━━━━━━━ [37m━━━━━━━━━━ 4秒 180毫秒/步 - aug_p: 0.0471 - d_loss: 0.0501 - g_loss: 3.9936 - gen_acc: 0.9965 - real_acc: 0.9862
24/46 ━━━━━━━━━━ [37m━━━━━━━━━━ 3秒 180毫秒/步 - aug_p: 0.0472 - d_loss: 0.0532 - g_loss: 3.9900 - gen_acc: 0.9949 - real_acc: 0.9853
25/46 ━━━━━━━━━━ [37m━━━━━━━━━━ 3秒 180毫秒/步 - aug_p: 0.0472 - d_loss: 0.0576 - g_loss: 3.9964 - gen_acc: 0.9935 - real_acc: 0.9832
26/46 ━━━━━━━━━━━ [37m━━━━━━━━━ 3秒 180毫秒/步 - aug_p: 0.0472 - d_loss: 0.0624 - g_loss: 3.9986 - gen_acc: 0.9917 - real_acc: 0.9813
27/46 ━━━━━━━━━━━ [37m━━━━━━━━━ 3秒 181毫秒/步 - aug_p: 0.0472 - d_loss: 0.0667 - g_loss: 4.0030 - gen_acc: 0.9901 - real_acc: 0.9795
28/46 ━━━━━━━━━━━━ [37m━━━━━━━━ 3秒 181毫秒/步 - aug_p: 0.0473 - d_loss: 0.0707 - g_loss: 4.0083 - gen_acc: 0.9887 - real_acc: 0.9778
29/46 ━━━━━━━━━━━━ [37m━━━━━━━━ 3秒 181毫秒/步 - aug_p: 0.0473 - d_loss: 0.0744 - g_loss: 4.0128 - gen_acc: 0.9873 - real_acc: 0.9762
30/46 ━━━━━━━━━━━━━ [37m━━━━━━━ 2秒 181毫秒/步 - aug_p: 0.0473 - d_loss: 0.0776 - g_loss: 4.0161 - gen_acc: 0.9862 - real_acc: 0.9748
31/46 ━━━━━━━━━━━━━ [37m━━━━━━━ 2秒 181毫秒/步 - aug_p: 0.0473 - d_loss: 0.0806 - g_loss: 4.0186 - gen_acc: 0.9851 - real_acc: 0.9735
32/46 ━━━━━━━━━━━━━ [37m━━━━━━━ 2秒 181毫秒/步 - aug_p: 0.0474 - d_loss: 0.0832 - g_loss: 4.0199 - gen_acc: 0.9841 - real_acc: 0.9724
33/46 ━━━━━━━━━━━━━━ [37m━━━━━━ 2秒 182毫秒/步 - aug_p: 0.0474 - d_loss: 0.0856 - g_loss: 4.0204 - gen_acc: 0.9832 - real_acc: 0.9714
34/46 ━━━━━━━━━━━━━━ [37m━━━━━━ 2秒 182毫秒/步 - aug_p: 0.0474 - d_loss: 0.0878 - g_loss: 4.0206 - gen_acc: 0.9825 - real_acc: 0.9705
35/46 ━━━━━━━━━━━━━━━ [37m━━━━━ 1秒 182毫秒/步 - aug_p: 0.0474 - d_loss: 0.0898 - g_loss: 4.0206 - gen_acc: 0.9818 - real_acc: 0.9697
36/46 ━━━━━━━━━━━━━━━ [37m━━━━━ 1秒 182毫秒/步 - aug_p: 0.0475 - d_loss: 0.0916 - g_loss: 4.0200 - gen_acc: 0.9811 - real_acc: 0.9690
37/46 ━━━━━━━━━━━━━━━━ [37m━━━━ 1秒 182毫秒/步 - aug_p: 0.0475 - d_loss: 0.0933 - g_loss: 4.0193 - gen_acc: 0.9805 - real_acc: 0.9683
38/46 ━━━━━━━━━━━━━━━━ [37m━━━━ 1秒 182毫秒/步 - aug_p: 0.0475 - d_loss: 0.0948 - g_loss: 4.0185 - gen_acc: 0.9800 - real_acc: 0.9677
39/46 ━━━━━━━━━━━━━━━━ [37m━━━━ 1秒 182毫秒/步 - aug_p: 0.0475 - d_loss: 0.0961 - g_loss: 4.0171 - gen_acc: 0.9796 - real_acc: 0.9672
40/46 ━━━━━━━━━━━━━━━━━ [37m━━━ 1秒 182毫秒/步 - aug_p: 0.0475 - d_loss: 0.0974 - g_loss: 4.0158 - gen_acc: 0.9791 - real_acc: 0.9667
41/46 ━━━━━━━━━━━━━━━━━ [37m━━━ 0秒 182毫秒/步 - aug_p: 0.0476 - d_loss: 0.0985 - g_loss: 4.0146 - gen_acc: 0.9787 - real_acc: 0.9662
42/46 ━━━━━━━━━━━━━━━━━━ [37m━━ 0秒 182毫秒/步 - aug_p: 0.0476 - d_loss: 0.0995 - g_loss: 4.0133 - gen_acc: 0.9784 - real_acc: 0.9658
43/46 ━━━━━━━━━━━━━━━━━━ [37m━━ 0秒 182毫秒/步 - aug_p: 0.0476 - d_loss: 0.1005 - g_loss: 4.0119 - gen_acc: 0.9781 - real_acc: 0.9655
44/46 ━━━━━━━━━━━━━━━━━━━ [37m━ 0秒 182毫秒/步 - aug_p: 0.0476 - d_loss: 0.1013 - g_loss: 4.0102 - gen_acc: 0.9778 - real_acc: 0.9652
45/46 ━━━━━━━━━━━━━━━━━━━ [37m━ 0秒 182毫秒/步 - aug_p: 0.0476 - d_loss: 0.1021 - g_loss: 4.0083 - gen_acc: 0.9775 - real_acc: 0.9649
46/46 ━━━━━━━━━━━━━━━━━━━━ 0秒 182毫秒/步 - aug_p: 0.0477 - d_loss: 0.1028 - g_loss: 4.0070 - gen_acc: 0.9773 - real_acc: 0.9647
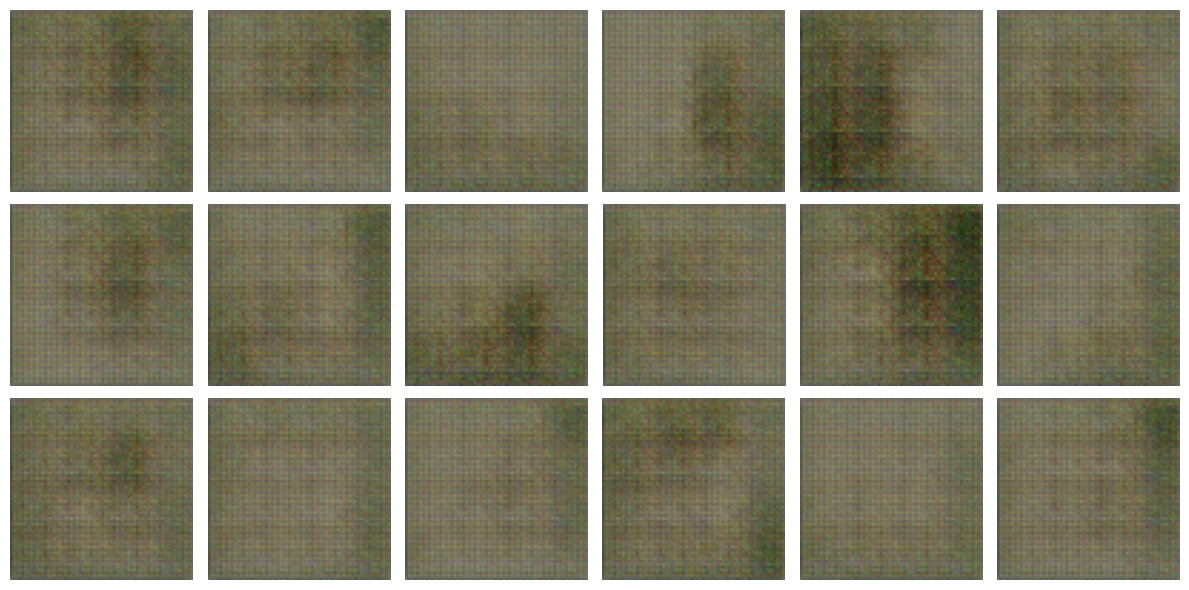
46/46 ━━━━━━━━━━━━━━━━━━━━ 21秒 304毫秒/步 - aug_p: 0.0477 - d_loss: 0.1035 - g_loss: 4.0058 - gen_acc: 0.9771 - real_acc: 0.9644 - val_kid: 3.0212
<keras.src.callbacks.history.History at 0x794f705d3390>
推論
# load the best model and generate images
model.load_weights(checkpoint_path)
model.plot_images()

結果
透過執行 400 個 epoch 的訓練(在 Colab 筆記本中約需 2-3 小時),可以使用此程式碼範例獲得高品質的影像生成結果。
隨機批次影像在 400 個 epoch 訓練過程中的演變(ema=0.999 以實現動畫平滑度): 
選定影像批次之間的潛在空間插值: 
我也建議嘗試在其他資料集上進行訓練,例如 CelebA。根據我的經驗,無需更改任何超參數即可獲得良好的結果(儘管鑑別器增強可能不是必要的)。
GAN 技巧與訣竅
我這個範例的目標是在 GAN 的易於實作和生成品質之間找到良好的權衡。在準備過程中,我使用這個儲存庫進行了多次消融研究。
在本節中,我將列出學到的經驗教訓以及我的建議,並依據我主觀的重要性排序。
我建議查看DCGAN 論文、這個NeurIPS 演講,以及這份大規模 GAN 研究,以了解其他人對此主題的看法。
架構技巧
- 解析度:在較高解析度下訓練 GAN 往往更困難,我建議先從 32x32 或 64x64 解析度開始實驗。
- 初始化:如果您在訓練初期看到強烈的彩色圖案,則可能是初始化問題。將圖層的 kernel_initializer 參數設定為隨機常態分佈,並降低標準差(建議值:0.02,遵循 DCGAN),直到問題消失。
- 升採樣:產生器中有兩種主要的升採樣方法。轉置卷積速度更快,但可能會導致棋盤格偽影,可以透過使用可被步幅整除的核大小來減少棋盤格偽影(對於步幅為 2,建議的核大小為 4)。向上採樣 + 標準卷積的品質可能稍低,但棋盤格偽影不是問題。我建議對其使用最近鄰插值,而不是雙線性插值。
- 鑑別器中的批次正規化:有時影響很大,我建議兩種方式都嘗試。
- 譜正規化:一種用於訓練 GAN 的流行技術,有助於穩定性。我建議同時停用批次正規化的可學習縮放參數。
- 殘差連接:雖然殘差鑑別器的行為相似,但根據我的經驗,殘差產生器更難訓練。然而,它們對於訓練大型和深度架構是必要的。我建議從非殘差架構開始。
- dropout:根據我的經驗,在鑑別器的最後一層之前使用 dropout 可以提高生成品質。建議的 dropout 率低於 0.5。
- Leaky ReLU:在鑑別器中使用 Leaky ReLU 激活函數,以使其梯度不那麼稀疏。建議的斜率/alpha 值為 0.2,遵循 DCGAN。
演算法技巧
- 損失函數:多年來,人們提出了許多用於訓練 GAN 的損失函數,承諾可以提高效能和穩定性。我在這個儲存庫中實作了其中 5 種,而我的經驗與這項 GAN 研究一致:似乎沒有任何損失函數能始終優於預設的非飽和 GAN 損失函數。我建議將其用作預設值。
- Adam 的 beta_1 參數:Adam 中的 beta_1 參數可以解釋為平均梯度估計的動量。DCGAN 中提出了使用 0.5 甚至 0.0 而不是預設值 0.9,這非常重要。此範例若使用其預設值將無法運作。
- 為生成影像和真實影像使用單獨的批次正規化:鑑別器的前向傳遞對於生成影像和真實影像應該是分開的。否則可能會導致偽影(在我的情況下為 45 度條紋)和效能下降。
- 產生器權重的指數移動平均:這有助於減少 KID 指標的變異數,並有助於平均訓練期間快速的調色盤變化。
- 產生器和鑑別器使用不同的學習率:如果資源充足,它可以幫助分別調整兩個網路的學習率。一個類似的想法是,對於另一個網路的每次更新,多次更新其中一個網路(通常是鑑別器)的權重。我建議兩個網路都使用相同的學習率 2e-4 (Adam),遵循 DCGAN,並且預設情況下僅更新它們一次。
- 標籤雜訊:單邊標籤平滑(真實標籤使用小於 1.0 的值),或向標籤添加雜訊可以正規化鑑別器,使其不會過於自信,但在我的情況下,它們並沒有提高效能。
- 自適應資料增強:由於它為訓練過程添加了另一個動態組件,因此預設情況下停用它,僅當其他組件已經運作良好時才啟用它。
相關著作
其他 GAN 相關的 Keras 程式碼範例
現代 GAN 架構脈絡
關於 GAN 的近期文獻概述:演講