RandAugment 圖像分類以提高穩健性
作者: Sayak PaulSachin Prasad
建立日期 2021/03/13
最後修改日期 2023/12/12
描述: RandAugment 用於訓練具有更高穩健性的圖像分類模型。

資料擴增是一種非常有用的技術,有助於提高卷積神經網路 (CNN) 的平移不變性。RandAugment 是一種用於視覺資料的隨機資料擴增程序,在 RandAugment:使用縮減搜尋空間的實用自動化資料擴增 中提出。它由強大的擴增轉換組成,例如色彩抖動、高斯模糊、飽和度等,以及更傳統的擴增轉換,例如隨機裁剪。
這些參數是針對給定的資料集和網路架構進行調整的。RandAugment 的作者也在原始論文(圖 2)中提供了 RandAugment 的虛擬程式碼。
最近,它已成為諸如 Noisy Student Training 和 用於一致性訓練的無監督資料擴增 等作品的關鍵組成部分。它也是 EfficientNets 成功的關鍵。
pip install keras-cv
匯入 & 設定
import os

os.environ["KERAS_BACKEND"] = "tensorflow"
import keras
import keras_cv
from keras import ops
from keras import layers
import tensorflow as tf
import numpy as np
import matplotlib.pyplot as plt
import tensorflow_datasets as tfds

tfds.disable_progress_bar()
keras.utils.set_random_seed(42)
載入 CIFAR10 資料集
在此範例中,我們將使用 CIFAR10 資料集。
(x_train, y_train), (x_test, y_test) = keras.datasets.cifar10.load_data()
print(f"Total training examples: {len(x_train)}")
print(f"Total test examples: {len(x_test)}")
Total training examples: 50000
Total test examples: 10000
定義超參數
AUTO = tf.data.AUTOTUNE
BATCH_SIZE = 128
EPOCHS = 1
IMAGE_SIZE = 72
初始化 RandAugment 物件
現在,我們將使用 RandAugment 作者建議的參數,從 imgaug.augmenters 模組初始化 RandAugment 物件。
rand_augment = keras_cv.layers.RandAugment(
    value_range=(0, 255), augmentations_per_image=3, magnitude=0.8
)
建立 TensorFlow Dataset 物件
train_ds_rand = (
    tf.data.Dataset.from_tensor_slices((x_train, y_train))
    .shuffle(BATCH_SIZE * 100)
    .batch(BATCH_SIZE)
    .map(
        lambda x, y: (tf.image.resize(x, (IMAGE_SIZE, IMAGE_SIZE)), y),
        num_parallel_calls=AUTO,
    )
    .map(
        lambda x, y: (rand_augment(tf.cast(x, tf.uint8)), y),
        num_parallel_calls=AUTO,
    )
    .prefetch(AUTO)
)

test_ds = (
    tf.data.Dataset.from_tensor_slices((x_test, y_test))
    .batch(BATCH_SIZE)
    .map(
        lambda x, y: (tf.image.resize(x, (IMAGE_SIZE, IMAGE_SIZE)), y),
        num_parallel_calls=AUTO,
    )
    .prefetch(AUTO)
)
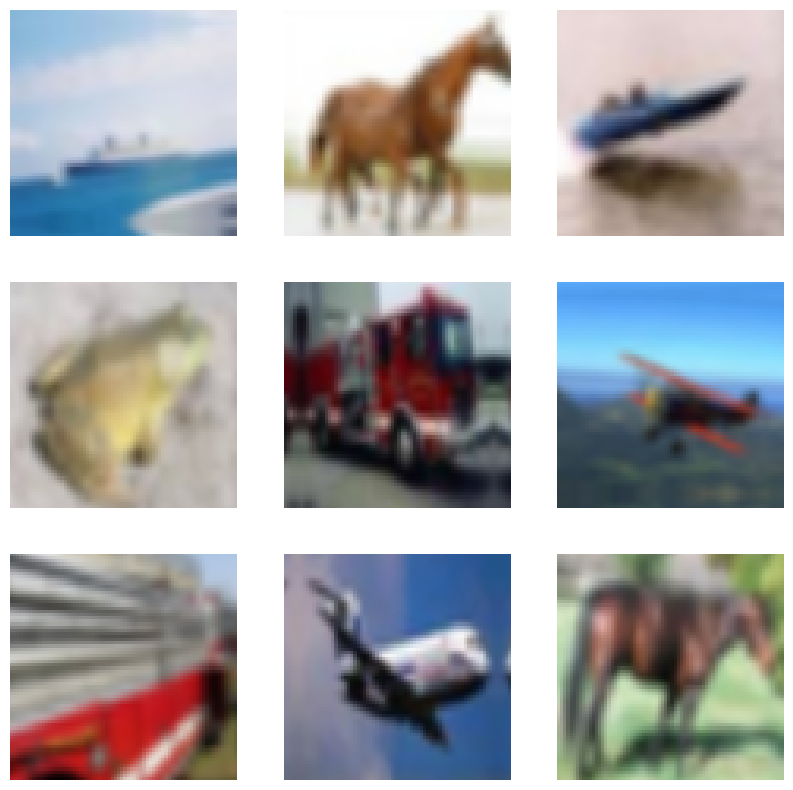
為了進行比較,我們也定義一個簡單的擴增管道,其中包含隨機翻轉、隨機旋轉和隨機縮放。
simple_aug = keras.Sequential(
    [
        layers.Resizing(IMAGE_SIZE, IMAGE_SIZE),
        layers.RandomFlip("horizontal"),
        layers.RandomRotation(factor=0.02),
        layers.RandomZoom(height_factor=0.2, width_factor=0.2),
    ]
)

# Now, map the augmentation pipeline to our training dataset
train_ds_simple = (
    tf.data.Dataset.from_tensor_slices((x_train, y_train))
    .shuffle(BATCH_SIZE * 100)
    .batch(BATCH_SIZE)
    .map(lambda x, y: (simple_aug(x), y), num_parallel_calls=AUTO)
    .prefetch(AUTO)
)
視覺化使用 RandAugment 擴增的資料集
sample_images, _ = next(iter(train_ds_rand))
plt.figure(figsize=(10, 10))
for i, image in enumerate(sample_images[:9]):
    ax = plt.subplot(3, 3, i + 1)
    plt.imshow(image.numpy().astype("int"))
    plt.axis("off")
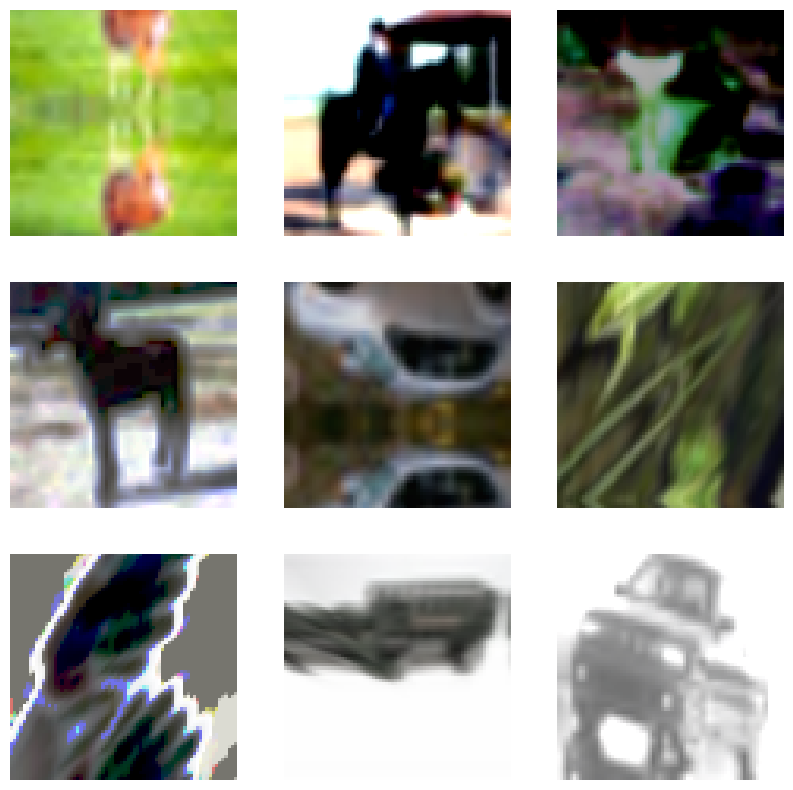
建議您執行上述程式碼區塊幾次,以查看不同的變化。
視覺化使用 simple_aug 擴增的資料集
sample_images, _ = next(iter(train_ds_simple))
plt.figure(figsize=(10, 10))
for i, image in enumerate(sample_images[:9]):
    ax = plt.subplot(3, 3, i + 1)
    plt.imshow(image.numpy().astype("int"))
    plt.axis("off")
定義模型建置公用函式
現在,我們定義一個基於 ResNet50V2 架構 的 CNN 模型。此外,請注意,網路內部已經有一個重新縮放層。這消除了對資料集進行任何單獨預處理的需要,並且對於部署目的特別有用。
def get_training_model():
    resnet50_v2 = keras.applications.ResNet50V2(
        weights=None,
        include_top=True,
        input_shape=(IMAGE_SIZE, IMAGE_SIZE, 3),
        classes=10,
    )
    model = keras.Sequential(
        [
            layers.Input((IMAGE_SIZE, IMAGE_SIZE, 3)),
            layers.Rescaling(scale=1.0 / 127.5, offset=-1),
            resnet50_v2,
        ]
    )
    return model


get_training_model().summary()
Model: "sequential_1"
┏━━━━━━━━━━━━━━━━━━━━━━━━━━━━━━━━━┳━━━━━━━━━━━━━━━━━━━━━━━━━━━┳━━━━━━━━━━━━┓
┃ Layer (type)                    ┃ Output Shape              ┃    Param # ┃
┡━━━━━━━━━━━━━━━━━━━━━━━━━━━━━━━━━╇━━━━━━━━━━━━━━━━━━━━━━━━━━━╇━━━━━━━━━━━━┩
│ rescaling (Rescaling)           │ (None, 72, 72, 3)         │          0 │
├─────────────────────────────────┼───────────────────────────┼────────────┤
│ resnet50v2 (Functional)         │ (None, 10)                │ 23,585,290 │
└─────────────────────────────────┴───────────────────────────┴────────────┘
Total params: 23,585,290 (89.97 MB)
Trainable params: 23,539,850 (89.80 MB)
Non-trainable params: 45,440 (177.50 KB)
我們將在兩個不同版本的資料集上訓練此網路
- 一個使用 RandAugment 擴增。
- 另一個使用
simple_aug擴增。
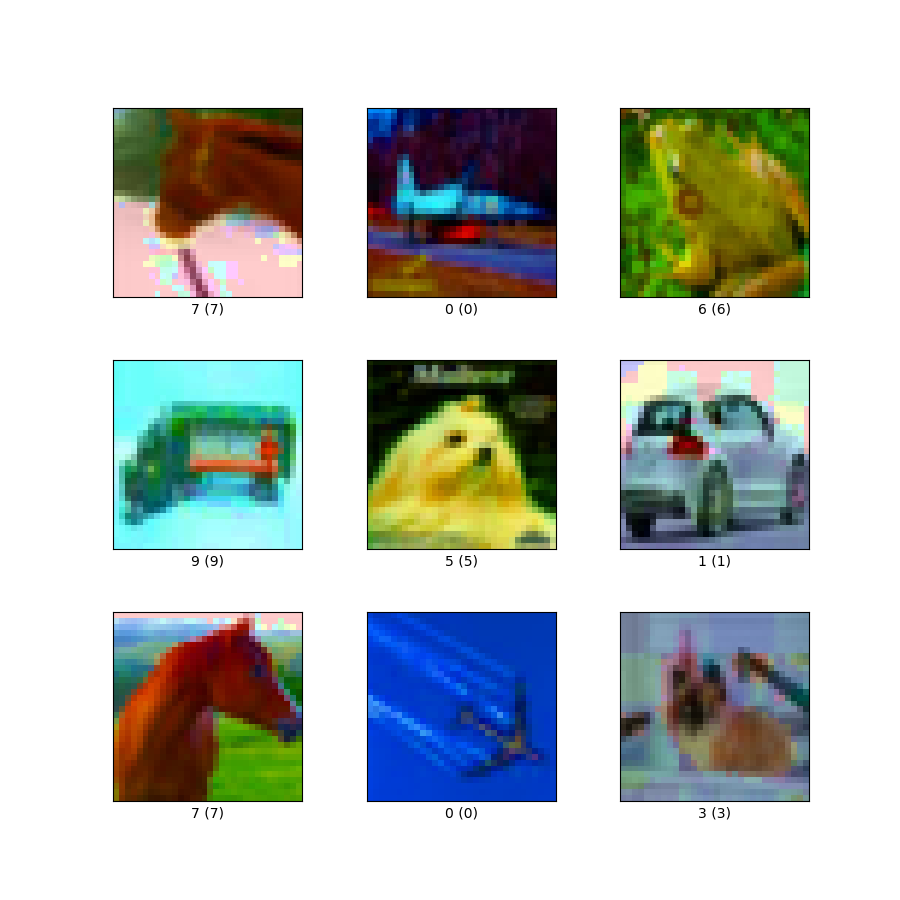
由於 RandAugment 以增強模型對常見擾動和損壞的穩健性而聞名,我們還將在 Hendrycks 等人提出的 對常見損壞和擾動的基準神經網路穩健性 中提出的 CIFAR-10-C 資料集上評估我們的模型。CIFAR-10-C 資料集包含 19 種不同的圖像損壞和擾動(例如,斑點雜訊、霧、高斯模糊等),這些損壞和擾動也具有不同的嚴重程度。在此範例中,我們將使用以下設定:cifar10_corrupted/saturate_5。此設定中的影像如下所示
為了再現性,我們序列化淺層網路的初始隨機權重。
initial_model = get_training_model()
initial_model.save_weights("initial.weights.h5")
使用 RandAugment 訓練模型
rand_aug_model = get_training_model()
rand_aug_model.load_weights("initial.weights.h5")
rand_aug_model.compile(
    loss="sparse_categorical_crossentropy", optimizer="adam", metrics=["accuracy"]
)
rand_aug_model.fit(train_ds_rand, validation_data=test_ds, epochs=EPOCHS)
_, test_acc = rand_aug_model.evaluate(test_ds)
print("Test accuracy: {:.2f}%".format(test_acc * 100))
 391/391 ━━━━━━━━━━━━━━━━━━━━ 1146s 3s/step - accuracy: 0.1677 - loss: 2.3232 - val_accuracy: 0.2818 - val_loss: 1.9966
 79/79 ━━━━━━━━━━━━━━━━━━━━ 39s 489ms/step - accuracy: 0.2803 - loss: 2.0073
Test accuracy: 28.18%
使用 simple_aug 訓練模型
simple_aug_model = get_training_model()
simple_aug_model.load_weights("initial.weights.h5")
simple_aug_model.compile(
    loss="sparse_categorical_crossentropy", optimizer="adam", metrics=["accuracy"]
)
simple_aug_model.fit(train_ds_simple, validation_data=test_ds, epochs=EPOCHS)
_, test_acc = simple_aug_model.evaluate(test_ds)
print("Test accuracy: {:.2f}%".format(test_acc * 100))
 391/391 ━━━━━━━━━━━━━━━━━━━━ 1132s 3s/step - accuracy: 0.3673 - loss: 1.7929 - val_accuracy: 0.4789 - val_loss: 1.4296
 79/79 ━━━━━━━━━━━━━━━━━━━━ 39s 494ms/step - accuracy: 0.4762 - loss: 1.4368
Test accuracy: 47.89%
載入 CIFAR-10-C 資料集並評估效能
# Load and prepare the CIFAR-10-C dataset
# (If it's not already downloaded, it takes ~10 minutes of time to download)
cifar_10_c = tfds.load("cifar10_corrupted/saturate_5", split="test", as_supervised=True)
cifar_10_c = cifar_10_c.batch(BATCH_SIZE).map(
    lambda x, y: (tf.image.resize(x, (IMAGE_SIZE, IMAGE_SIZE)), y),
    num_parallel_calls=AUTO,
)

# Evaluate `rand_aug_model`
_, test_acc = rand_aug_model.evaluate(cifar_10_c, verbose=0)
print(
    "Accuracy with RandAugment on CIFAR-10-C (saturate_5): {:.2f}%".format(
        test_acc * 100
    )
)

# Evaluate `simple_aug_model`
_, test_acc = simple_aug_model.evaluate(cifar_10_c, verbose=0)
print(
    "Accuracy with simple_aug on CIFAR-10-C (saturate_5): {:.2f}%".format(
        test_acc * 100
    )
)
 Downloading and preparing dataset 2.72 GiB (download: 2.72 GiB, generated: Unknown size, total: 2.72 GiB) to /home/sachinprasad/tensorflow_datasets/cifar10_corrupted/saturate_5/1.0.0...
 Dataset cifar10_corrupted downloaded and prepared to /home/sachinprasad/tensorflow_datasets/cifar10_corrupted/saturate_5/1.0.0. Subsequent calls will reuse this data.
Accuracy with RandAugment on CIFAR-10-C (saturate_5): 30.36%
Accuracy with simple_aug on CIFAR-10-C (saturate_5): 37.18%
就本範例而言,我們僅將模型訓練了一個 epoch。在 CIFAR-10-C 資料集上,具有 RandAugment 的模型可以實現更高的準確度(例如,在一個實驗中達到 76.64%),而使用 simple_aug 訓練的模型則不行(例如,64.80%)。RandAugment 也有助於穩定訓練。
在筆記本中,您可能會注意到,以增加 RandAugment 的訓練時間為代價,我們能夠在 CIFAR-10-C 資料集上獲得更好的效能。您可以嘗試使用 CIFAR-10-C 資料集隨附的其他損壞和擾動設定,看看 RandAugment 是否有幫助。
您也可以嘗試 RandAugment 物件中 n 和 m 的不同值。在 原始論文 中,作者展示了個別擴增轉換對特定任務和一系列消融研究的影響。歡迎您查看。
RandAugment 在提升深度學習模型於電腦視覺的強健性方面展現了巨大的進展,如 Noisy Student Training 和 FixMatch 等研究所示。這使得 RandAugment 成為訓練各種視覺模型非常有用的方法。
您可以使用託管在 Hugging Face Hub 上的已訓練模型,並在 Hugging Face Spaces 上試用示範。