使用 SegFormer 和 Hugging Face Transformers 進行語義分割
作者: Sayak Paul
建立日期 2023/01/25
上次修改日期 2023/01/29
描述: 微調 SegFormer 模型變體以進行語義分割。

簡介
在此範例中,我們展示如何微調 SegFormer 模型變體,以便在自訂資料集上進行語義分割。語義分割的任務是將類別分配給影像的每個像素。SegFormer 在 SegFormer:用於使用 Transformer 進行語義分割的簡單高效設計 中提出。SegFormer 使用分層 Transformer 架構(稱為「混合 Transformer」)作為其編碼器,並使用輕量級解碼器進行分割。因此,它在語義分割上產生最先進的效能,同時比現有模型更有效率。如需更多詳細資訊,請參閱原始論文。

我們利用 Hugging Face Transformers 來載入預訓練的 SegFormer 檢查點,並在自訂資料集上微調它。
注意: 此範例重複使用了以下來源的程式碼
若要執行此範例,我們需要安裝 transformers 函式庫
!!pip install transformers -q
[]
載入資料
在此範例中,我們使用 Oxford-IIIT Pets 資料集。我們利用 tensorflow_datasets 來載入資料集。
import tensorflow_datasets as tfds

dataset, info = tfds.load("oxford_iiit_pet:3.*.*", with_info=True)
/opt/conda/lib/python3.7/site-packages/tensorflow_io/python/ops/__init__.py:98: UserWarning: unable to load libtensorflow_io_plugins.so: unable to open file: libtensorflow_io_plugins.so, from paths: ['/opt/conda/lib/python3.7/site-packages/tensorflow_io/python/ops/libtensorflow_io_plugins.so']
caused by: ['/opt/conda/lib/python3.7/site-packages/tensorflow_io/python/ops/libtensorflow_io_plugins.so: undefined symbol: _ZN3tsl5mutexC1Ev']
  warnings.warn(f"unable to load libtensorflow_io_plugins.so: {e}")
/opt/conda/lib/python3.7/site-packages/tensorflow_io/python/ops/__init__.py:104: UserWarning: file system plugins are not loaded: unable to open file: libtensorflow_io.so, from paths: ['/opt/conda/lib/python3.7/site-packages/tensorflow_io/python/ops/libtensorflow_io.so']
caused by: ['/opt/conda/lib/python3.7/site-packages/tensorflow_io/python/ops/libtensorflow_io.so: undefined symbol: _ZNK10tensorflow4data11DatasetBase8FinalizeEPNS_15OpKernelContextESt8functionIFN3tsl8StatusOrISt10unique_ptrIS1_NS5_4core15RefCountDeleterEEEEvEE']
  warnings.warn(f"file system plugins are not loaded: {e}")
準備資料集
為了準備用於訓練和評估的資料集,我們
- 使用預訓練 SegFormer 時所用的平均值和標準差來正規化影像。
- 從分割遮罩減去 1,使像素值從 0 開始。
- 調整影像大小。
- 轉置影像,使其為
"channels_first"格式。這是為了使其與 Hugging Face Transformers 的 SegFormer 模型相容。
import tensorflow as tf
from tensorflow.keras import backend

image_size = 512
mean = tf.constant([0.485, 0.456, 0.406])
std = tf.constant([0.229, 0.224, 0.225])


def normalize(input_image, input_mask):
    input_image = tf.image.convert_image_dtype(input_image, tf.float32)
    input_image = (input_image - mean) / tf.maximum(std, backend.epsilon())
    input_mask -= 1
    return input_image, input_mask


def load_image(datapoint):
    input_image = tf.image.resize(datapoint["image"], (image_size, image_size))
    input_mask = tf.image.resize(
        datapoint["segmentation_mask"],
        (image_size, image_size),
        method="bilinear",
    )

    input_image, input_mask = normalize(input_image, input_mask)
    input_image = tf.transpose(input_image, (2, 0, 1))
    return {"pixel_values": input_image, "labels": tf.squeeze(input_mask)}
現在,我們使用上述實用工具來準備 tf.data.Dataset 物件,包括 prefetch() 以獲得效能。變更 batch_size 以符合您用於訓練的 GPU 上 GPU 記憶體的大小。
auto = tf.data.AUTOTUNE
batch_size = 4

train_ds = (
    dataset["train"]
    .cache()
    .shuffle(batch_size * 10)
    .map(load_image, num_parallel_calls=auto)
    .batch(batch_size)
    .prefetch(auto)
)
test_ds = (
    dataset["test"]
    .map(load_image, num_parallel_calls=auto)
    .batch(batch_size)
    .prefetch(auto)
)
我們可以檢查輸入影像及其分割對應圖的形狀
print(train_ds.element_spec)
{'pixel_values': TensorSpec(shape=(None, 3, 512, 512), dtype=tf.float32, name=None), 'labels': TensorSpec(shape=(None, 512, 512), dtype=tf.float32, name=None)}
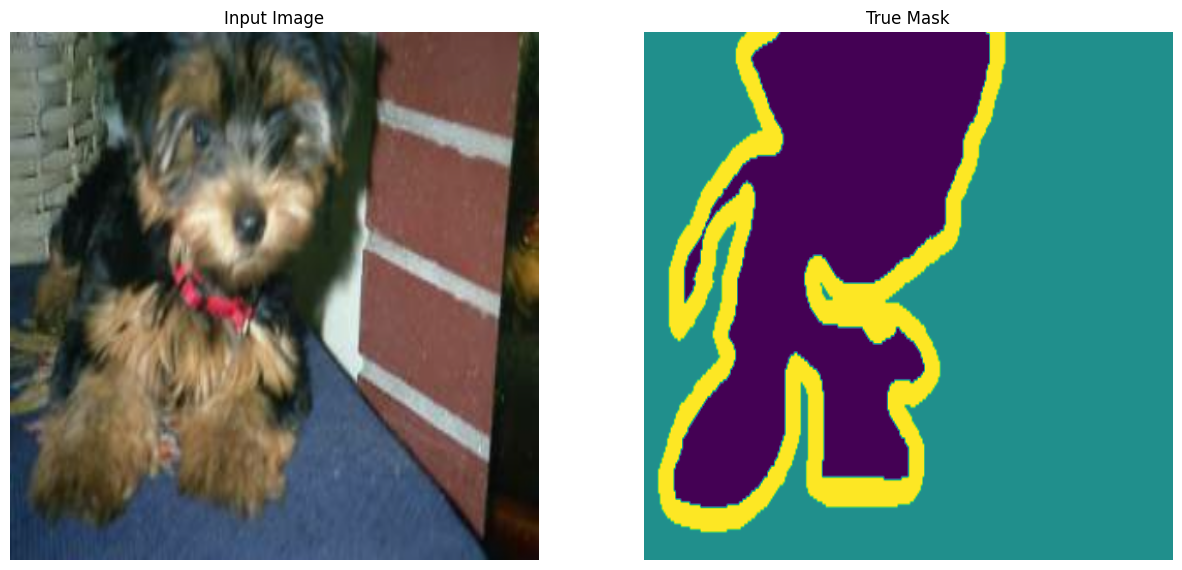
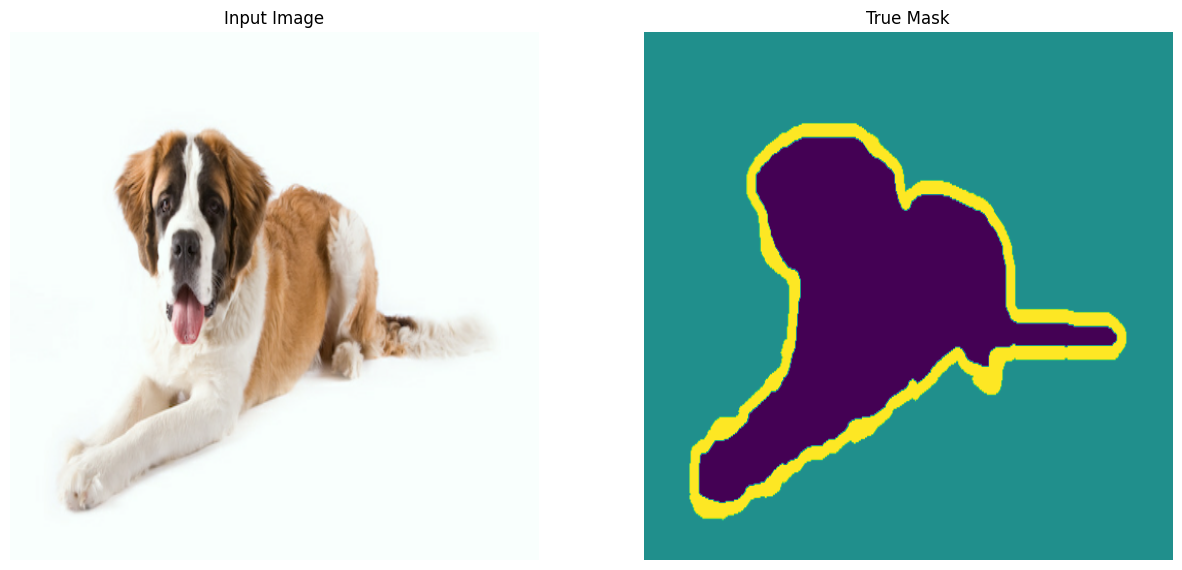
視覺化資料集
import matplotlib.pyplot as plt


def display(display_list):
    plt.figure(figsize=(15, 15))

    title = ["Input Image", "True Mask", "Predicted Mask"]

    for i in range(len(display_list)):
        plt.subplot(1, len(display_list), i + 1)
        plt.title(title[i])
        plt.imshow(tf.keras.utils.array_to_img(display_list[i]))
        plt.axis("off")
    plt.show()


for samples in train_ds.take(2):
    sample_image, sample_mask = samples["pixel_values"][0], samples["labels"][0]
    sample_image = tf.transpose(sample_image, (1, 2, 0))
    sample_mask = tf.expand_dims(sample_mask, -1)
    display([sample_image, sample_mask])
載入預訓練的 SegFormer 檢查點
現在,我們從 Hugging Face Transformers 載入預訓練的 SegFormer 模型變體。SegFormer 模型有不同的變體,稱為 MiT-B0 到 MiT-B5。您可以在 此處 找到這些檢查點。我們載入最小的變體 Mix-B0,它在推論效率和預測效能之間產生良好的權衡。
from transformers import TFSegformerForSemanticSegmentation

model_checkpoint = "nvidia/mit-b0"
id2label = {0: "outer", 1: "inner", 2: "border"}
label2id = {label: id for id, label in id2label.items()}
num_labels = len(id2label)
model = TFSegformerForSemanticSegmentation.from_pretrained(
    model_checkpoint,
    num_labels=num_labels,
    id2label=id2label,
    label2id=label2id,
    ignore_mismatched_sizes=True,
)
WARNING:tensorflow:5 out of the last 5 calls to <function Conv._jit_compiled_convolution_op at 0x7fa8cc1139e0> triggered tf.function retracing. Tracing is expensive and the excessive number of tracings could be due to (1) creating @tf.function repeatedly in a loop, (2) passing tensors with different shapes, (3) passing Python objects instead of tensors. For (1), please define your @tf.function outside of the loop. For (2), @tf.function has reduce_retracing=True option that can avoid unnecessary retracing. For (3), please refer to https://tensorflow.dev.org.tw/guide/function#controlling_retracing and https://tensorflow.dev.org.tw/api_docs/python/tf/function for  more details.

WARNING:tensorflow:5 out of the last 5 calls to <function Conv._jit_compiled_convolution_op at 0x7fa8cc1139e0> triggered tf.function retracing. Tracing is expensive and the excessive number of tracings could be due to (1) creating @tf.function repeatedly in a loop, (2) passing tensors with different shapes, (3) passing Python objects instead of tensors. For (1), please define your @tf.function outside of the loop. For (2), @tf.function has reduce_retracing=True option that can avoid unnecessary retracing. For (3), please refer to https://tensorflow.dev.org.tw/guide/function#controlling_retracing and https://tensorflow.dev.org.tw/api_docs/python/tf/function for  more details.

WARNING:tensorflow:6 out of the last 6 calls to <function Conv._jit_compiled_convolution_op at 0x7fa8bde37440> triggered tf.function retracing. Tracing is expensive and the excessive number of tracings could be due to (1) creating @tf.function repeatedly in a loop, (2) passing tensors with different shapes, (3) passing Python objects instead of tensors. For (1), please define your @tf.function outside of the loop. For (2), @tf.function has reduce_retracing=True option that can avoid unnecessary retracing. For (3), please refer to https://tensorflow.dev.org.tw/guide/function#controlling_retracing and https://tensorflow.dev.org.tw/api_docs/python/tf/function for  more details.

WARNING:tensorflow:6 out of the last 6 calls to <function Conv._jit_compiled_convolution_op at 0x7fa8bde37440> triggered tf.function retracing. Tracing is expensive and the excessive number of tracings could be due to (1) creating @tf.function repeatedly in a loop, (2) passing tensors with different shapes, (3) passing Python objects instead of tensors. For (1), please define your @tf.function outside of the loop. For (2), @tf.function has reduce_retracing=True option that can avoid unnecessary retracing. For (3), please refer to https://tensorflow.dev.org.tw/guide/function#controlling_retracing and https://tensorflow.dev.org.tw/api_docs/python/tf/function for  more details.
Some layers from the model checkpoint at nvidia/mit-b0 were not used when initializing TFSegformerForSemanticSegmentation: ['classifier']
- This IS expected if you are initializing TFSegformerForSemanticSegmentation from the checkpoint of a model trained on another task or with another architecture (e.g. initializing a BertForSequenceClassification model from a BertForPreTraining model).
- This IS NOT expected if you are initializing TFSegformerForSemanticSegmentation from the checkpoint of a model that you expect to be exactly identical (initializing a BertForSequenceClassification model from a BertForSequenceClassification model).
Some layers of TFSegformerForSemanticSegmentation were not initialized from the model checkpoint at nvidia/mit-b0 and are newly initialized: ['decode_head']
You should probably TRAIN this model on a down-stream task to be able to use it for predictions and inference.
警告是告訴我們,我們正在捨棄一些權重,並重新初始化其他一些權重。不要驚慌!這絕對是正常的。由於我們使用的是自訂資料集,其語義類別標籤集與預訓練資料集不同,因此 TFSegformerForSemanticSegmentation 正在初始化新的解碼器頭。
現在,我們可以初始化最佳化器,並使用它來編譯模型。
編譯模型
lr = 0.00006
optimizer = tf.keras.optimizers.Adam(learning_rate=lr)
model.compile(optimizer=optimizer)
No loss specified in compile() - the model's internal loss computation will be used as the loss. Don't panic - this is a common way to train TensorFlow models in Transformers! To disable this behaviour please pass a loss argument, or explicitly pass `loss=None` if you do not want your model to compute a loss.
請注意,我們沒有使用任何損失函數來編譯模型。這是因為模型的正向傳遞 實作了當我們在輸入影像旁邊提供標籤時的損失計算部分。計算損失後,模型會傳回結構化的 dataclass 物件,然後使用該物件來引導訓練流程。
編譯模型後,我們可以繼續呼叫 fit() 來開始微調流程!
用於監控訓練進度的預測回呼
當模型正在微調時,它可以幫助我們視覺化一些範例預測,從而幫助我們監控模型的進度。此回呼的靈感來自本教學。
from IPython.display import clear_output


def create_mask(pred_mask):
    pred_mask = tf.math.argmax(pred_mask, axis=1)
    pred_mask = tf.expand_dims(pred_mask, -1)
    return pred_mask[0]


def show_predictions(dataset=None, num=1):
    if dataset:
        for sample in dataset.take(num):
            images, masks = sample["pixel_values"], sample["labels"]
            masks = tf.expand_dims(masks, -1)
            pred_masks = model.predict(images).logits
            images = tf.transpose(images, (0, 2, 3, 1))
            display([images[0], masks[0], create_mask(pred_masks)])
    else:
        display(
            [
                sample_image,
                sample_mask,
                create_mask(model.predict(tf.expand_dims(sample_image, 0))),
            ]
        )


class DisplayCallback(tf.keras.callbacks.Callback):
    def __init__(self, dataset, **kwargs):
        super().__init__(**kwargs)
        self.dataset = dataset

    def on_epoch_end(self, epoch, logs=None):
        clear_output(wait=True)
        show_predictions(self.dataset)
        print("\nSample Prediction after epoch {}\n".format(epoch + 1))
訓練模型
# Increase the number of epochs if the results are not of expected quality.
epochs = 5

history = model.fit(
    train_ds,
    validation_data=test_ds,
    callbacks=[DisplayCallback(test_ds)],
    epochs=epochs,
)
1/1 [==============================] - 0s 54ms/step

Sample Prediction after epoch 5
920/920 [==============================] - 89s 97ms/step - loss: 0.1742 - val_loss: 0.1927
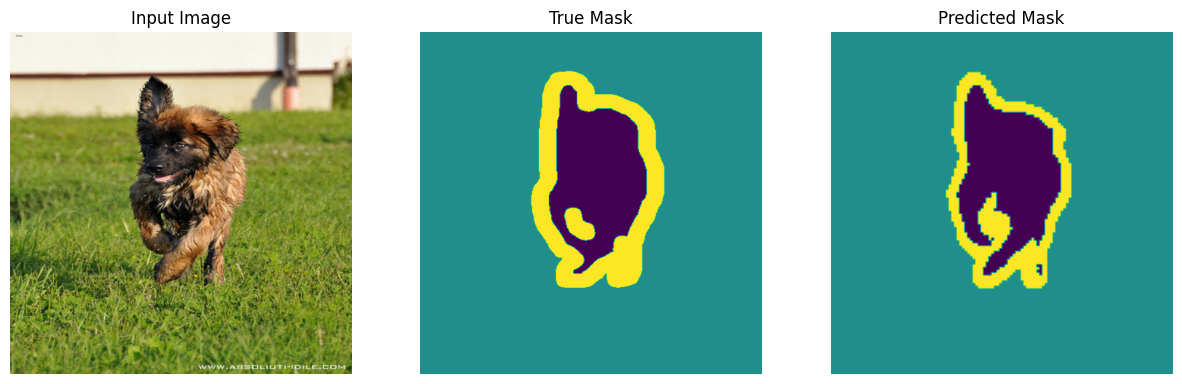
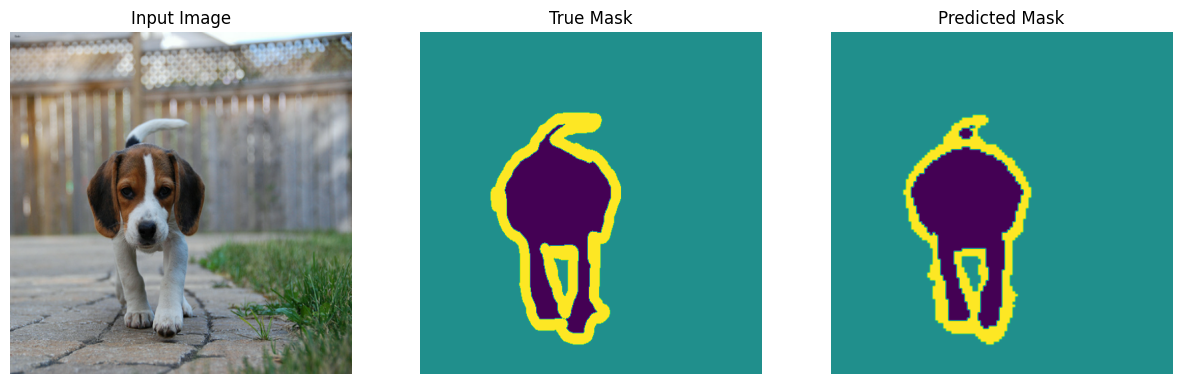
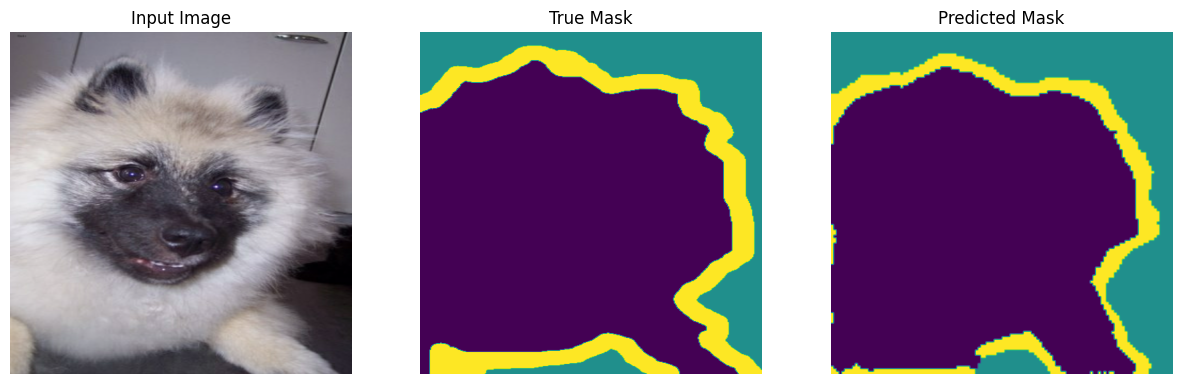
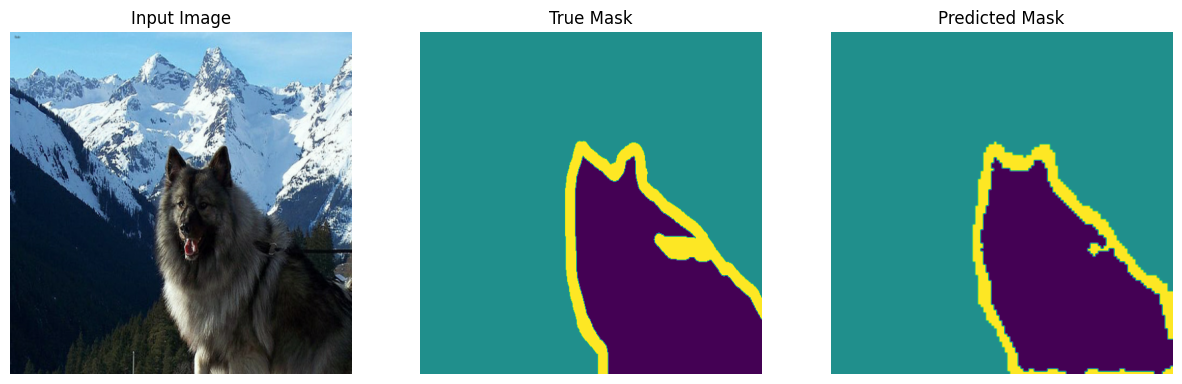
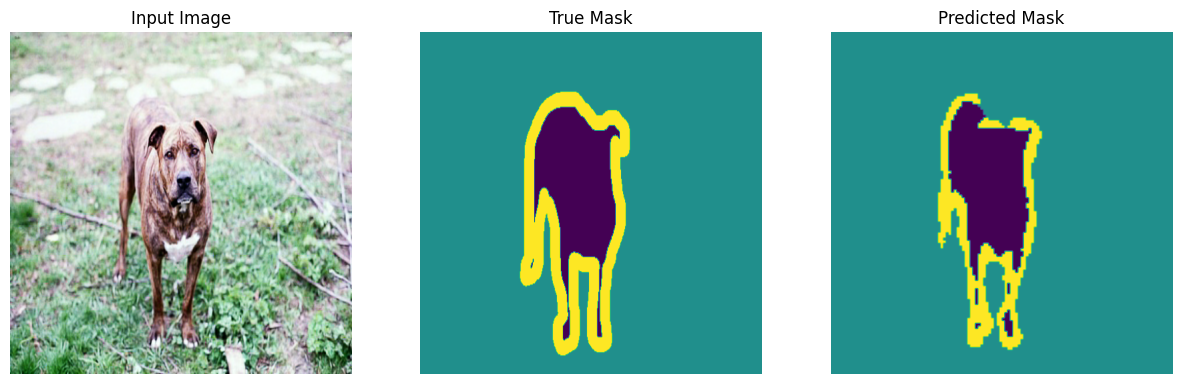
推論
我們對測試集中的一些範例執行推論。
show_predictions(test_ds, 5)
1/1 [==============================] - 0s 54ms/step
1/1 [==============================] - 0s 54ms/step
1/1 [==============================] - 0s 53ms/step
1/1 [==============================] - 0s 53ms/step
1/1 [==============================] - 0s 53ms/step
結論
在此範例中,我們學習了如何在自訂資料集上微調 SegFormer 模型變體,以進行語義分割。為了簡潔起見,此範例保持簡短。但是,您可以進一步嘗試一些事情
- 納入資料增強以潛在地改善結果。
- 使用更大的 SegFormer 模型檢查點,以查看結果如何受到影響。
- 將微調後的模型推送至 Hugging Face,以便輕鬆與社群分享。您只需執行
model.push_to_hub("your-username/your-awesome-model")即可完成。接著,您可以使用TFSegformerForSemanticSegmentation.from_pretrained("your-username/your-awesome-model")來載入模型。如果您需要參考範例,這裡有一個端對端範例。 - 如果您希望在模型微調的過程中,將模型檢查點推送至 Hub,則可以改用
PushToHubCallbackKeras 回調函數。 這裡有一個範例。 這裡有一個使用此回調函數建立的模型儲存庫範例。